It has been a while since I ’m using canon 70d to shoot YouTube videos . But , I recently found out about CineStyle by Technicolor . Without giving it much thought , I went beforehand and instal it on DSLR . And I ’ve to say , I ’m impressed .
To those who do n’t experience , Cinestyle is a depiction visibility usable for Canon EOS Cameras . Consider it like this ; generally , when you weigh the phonograph recording button of your DSLR , it shoots video inAutomode . And any video shot in an motorcar mode has less room for color correction in the post . However , if you change the word-painting profile mode fromAuto to Cinestyle , it ’ll capture more particular in the video recording , return you more exemption to play with colors .
Is Cinestyle safe ?
For the most part , yes it ’s . Like I said , Cinestyle is a colouring material profile , ( and not a firmware ) . It only contain slender tweaks to the photograph preferences like curve , adjustments , saturation , and contrast etc . So , it wo n’t involve your camera firmware . In a nutshell , Cinestyle does n’t void your warranty .
To get started with Cinestyle , just load the cinestyle file on your DSLR with the EOS utility , and get going using it immediately , That said , if it ’s your first prison term owning a DSLR , you might get the cognitive process a bit complicated , so here is a measure by footfall template on how to download and employ Cinesytle on a Canon tv camera . The plugin work on only for Canon tv camera but you’re able to receive similar plugins ( like Cineflat for Nikon ) online . That said , let ’s start . Shall we ?
Read : Use your old Android / iPad as an external monitoring equipment for DSLR .
Part 1: Download Cinestyle on your computer
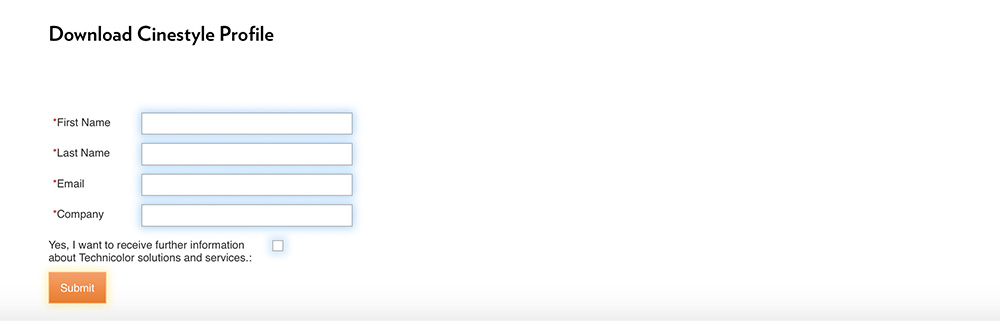
1 . To get begin , download the CineStyleplugin from the Technicolor website . You will have to embark your item like name , e-mail savoir-faire , etc . Once you compress the submit clitoris , you ’ll get the download data link in your email , so verify you use a legit e-mail address .
Once you penetrate on the download link and it ’ll mechanically unzip a leaflet on your computing machine .
2 . Now that you have cinestyle ’s files on your computer , you need an app to transfer it to your DSLR , simply copy - pasting it in the SD card wo n’t work .
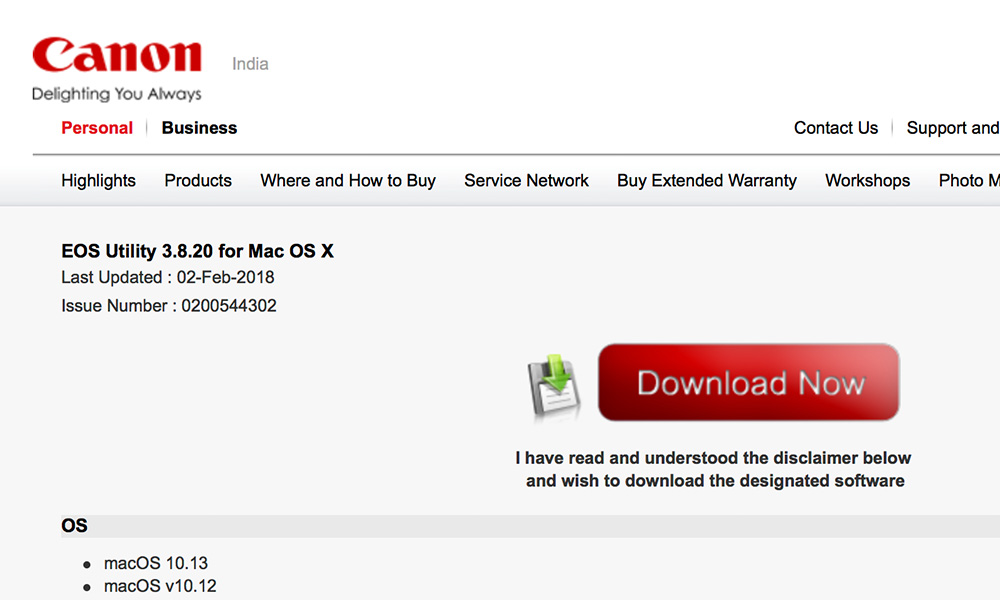
So , head overCanon official website , press your Camera model figure , and download the relevant EOS Utility app .
3 . Connect your DSLR to your computer using the USB cable and switch on the camera . Once connect , the EOS Utility app will automatically establish on your computer silver screen .
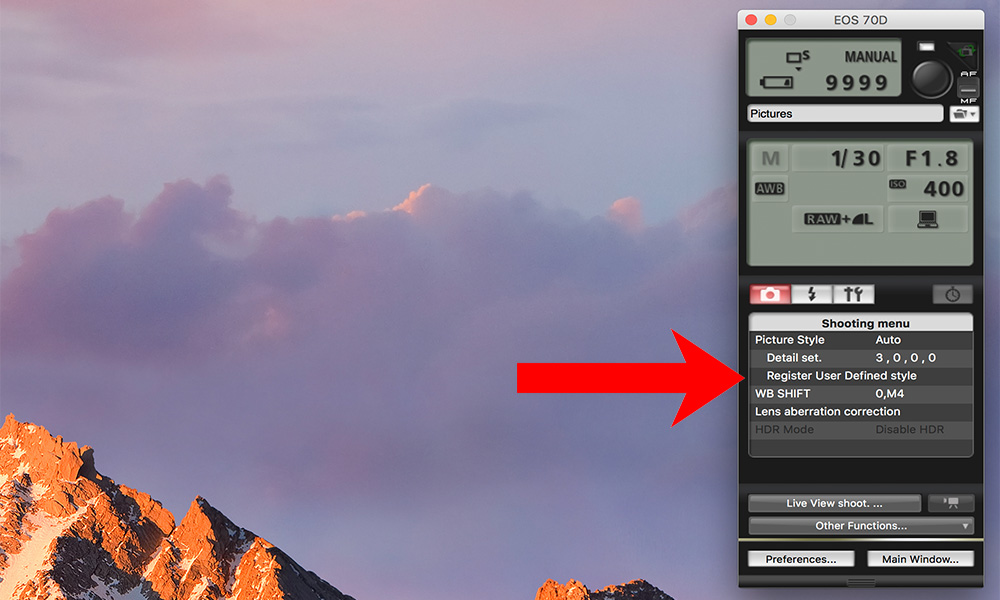
5 . In the EOS usefulness app , cluck on camera options . A novel window will open with a bunch of camera options . get through on “ Register User Defined style ” in the shot menu .
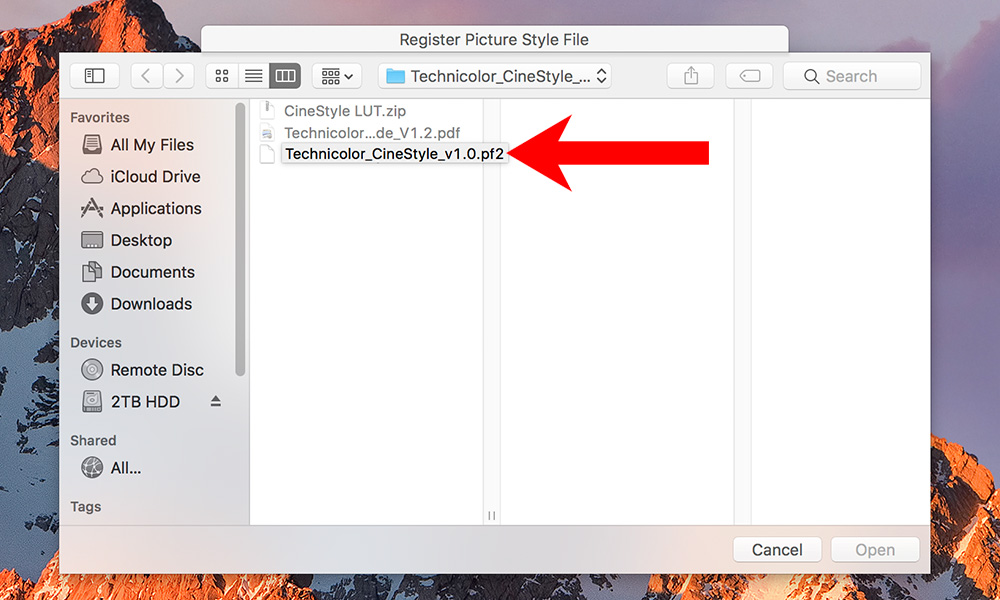
6 . This will found the finder window where you ’ll have to turn up the downloaded file in your data processor . clack on the browse button and pilot to the brochure containing the ‘ technicolor_cinestyle_v1 ’ file .
Next , click OK , to preserve change . That ’s it , you have successfully loaded Cinestyle in your DSLR . It ’s a small file so , wo n’t take much sentence . Exit the coating and disconnect your DSLR .
Part 2: Set CineStyle mode on your DSLR
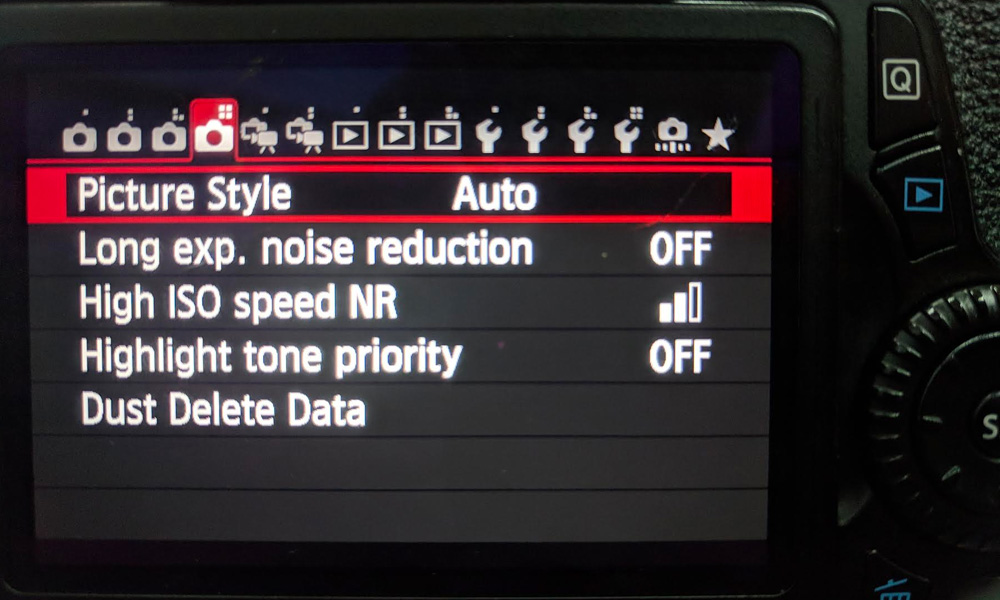
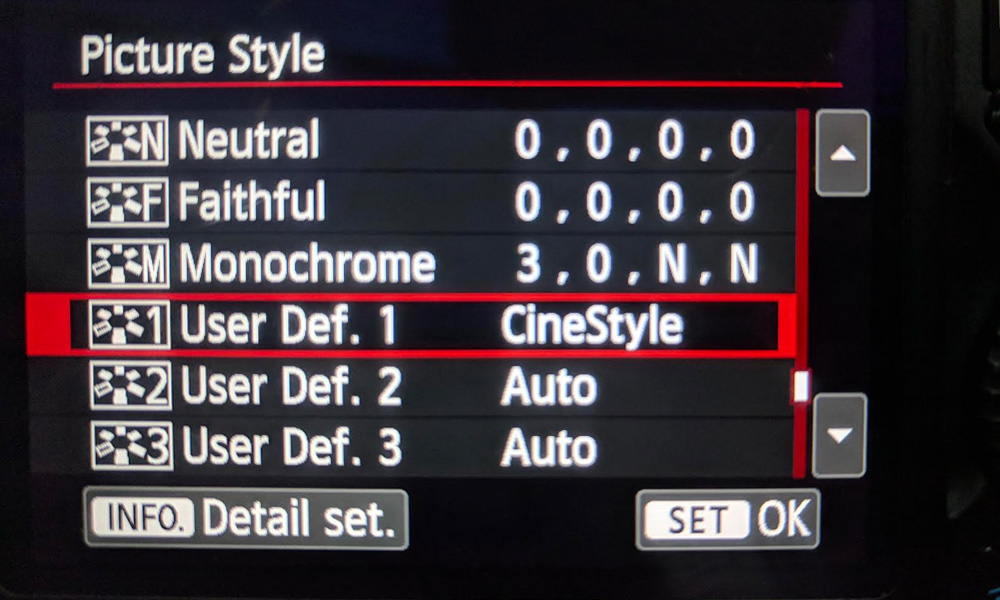
1 . By nonremittal , your DSLRs records in Auto , so for commemorate in Cinestyle modality , you need to set the picture profile to Cinestyle . To do this , open up your DSLR , go toSetting > Video preferences > Look for the optionPicture Styleand open it .
2 . A raw windowpane will open with various predefined exploiter modes , scroll down and you shall seeCinestylemode . Enable it .
You will notice that your preview in viewfinder turn a bit faded . The videos will look washed out . This is because the saturation , contrast , etc are define to moo . Do n’t worry , this is normal and mean , you are now recording in CineStyle mode .
To take off show in Cinetstyle , only press the book button and there you go .
Part 3: Color Grade CineStyle in your Video editor
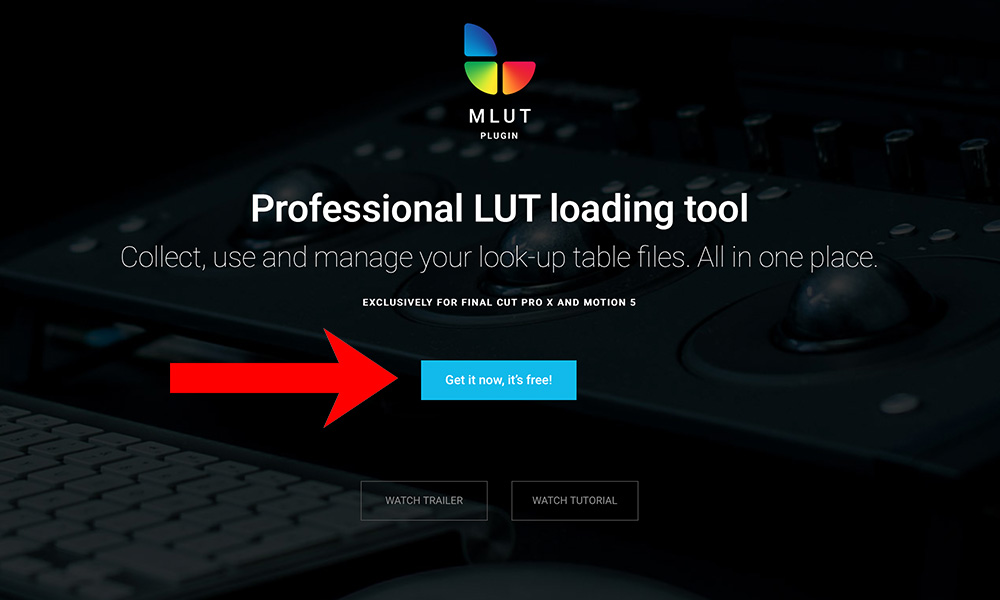
Now , that you have tape the footage in Cinestyle , you ’ll ask to color compensate them using your video editing software . Adobe Premiere Pro CC has the in - built Lumetri color venire to enforce LUTs whereas if you are a Final Cut Pro X user , you ’ll need third - party annexe to apply LUTs like the mLUT plugin .
So , permit ’s see how to color grad Cinesytle television in Final Cut Pro hug drug
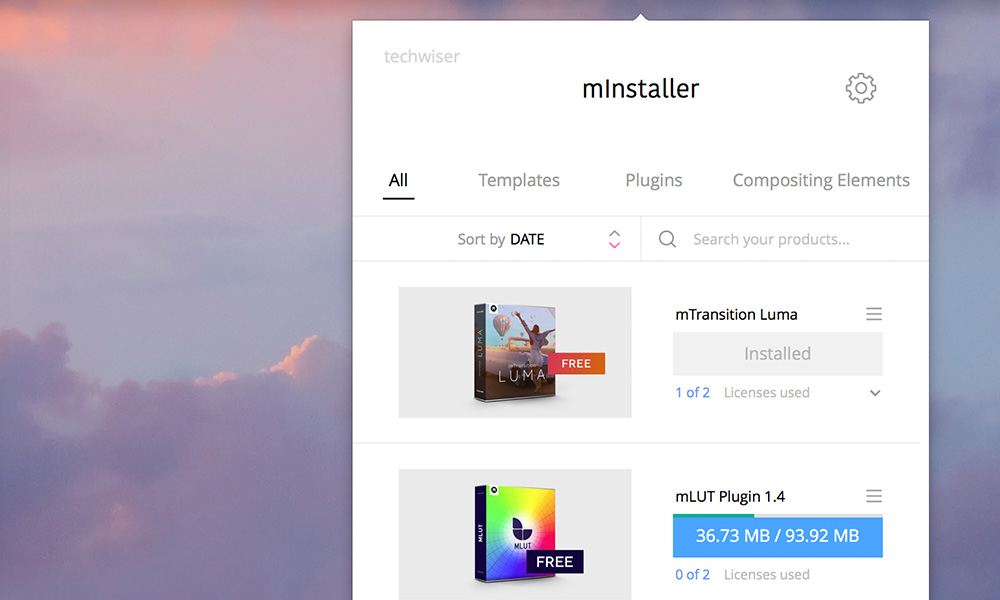
1 . set forth by downloading the mLUT plugin on your data processor . To do this , create a free chronicle at motionvfx and downloadmInstaller .
Once download , undefendable and set up the mInstaller software on your electronic computer . This program is required to put in mLUT on your computer .
Next , download mLut(free ) from the official website .
2 . To proceed , you will have to add mLut in your handcart , and once you tap checkout , you ’ll be redirect to the minstaller app that we downloaded in the previous whole tone . The initiation will take place automatically
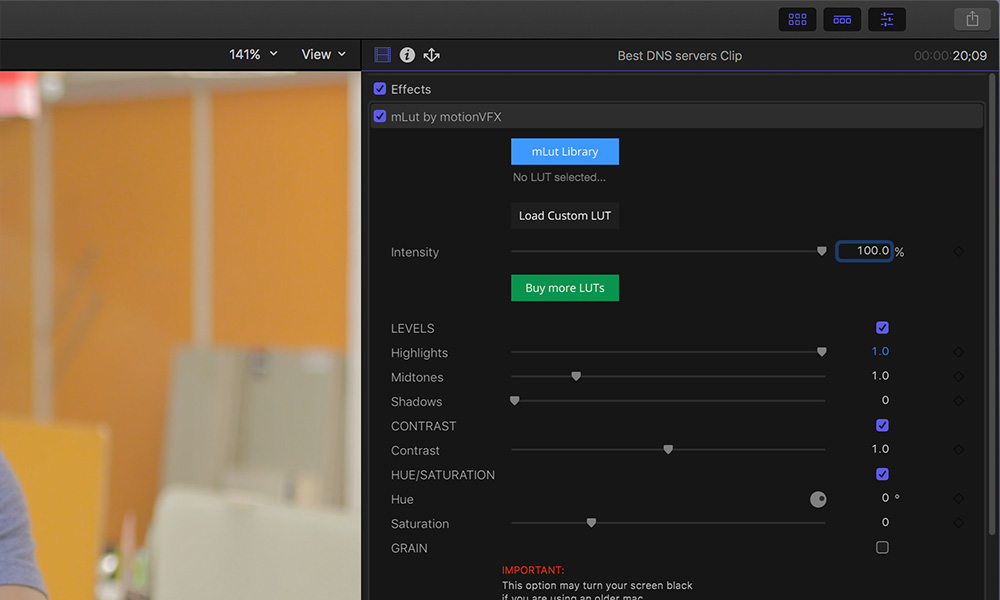
3 . Next , open or re-start FCP . Go toEffects , and there you ’ll findmLut .
Simply choose the picture clips and apply the luts by clicking on the mLut program library .
To adjust the chroma , press the file , and then go to video effects and aline the intensity from there . That ’s it .
Wrapping Up: Use CineStyle to Shoot Cinematic Video
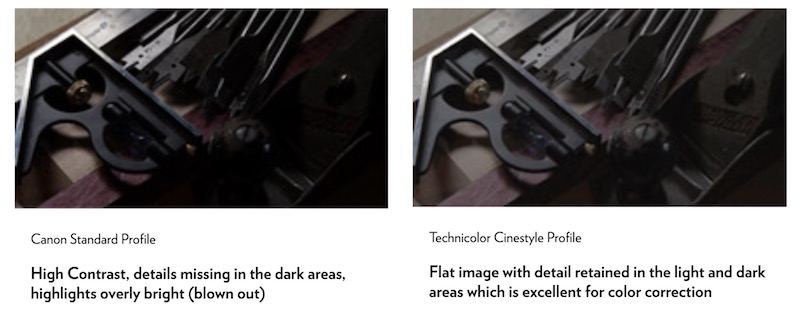
CineStyle is basically a picture visibility which cut some of the contrast ; effectively capturing more details in your double . you could accomplish the same effect , by turning down the line , saturation , and sharpness of your camera . But Cinestyle , helps you do all of that with just a click .
Do remember though , if you choose to go with cinestyle , you ’ll by all odds have to colorize grade your footage in office . So if you ’re not into color correction or say you do n’t really need cinelook in your telecasting , it ’s perfectly fine to hit in auto . But if you ’re work on a task , where there are multiple camera involved , then fool in cinestyle does help in keep up a consistent aspect .
38 Google Earth Hidden Weird Places with Coordinates
Canva Icons and Symbols Meaning – Complete Guide
What Snapchat Green Dot Means, When It Shows, and for…
Instagram’s Edits App: 5 Features You Need to Know About
All Netflix Hidden and Secret Codes (April 2025)
All Emojis Meaning and Usecase – Explained (April 2025)
Dropbox Icons and Symbols Meaning (Mobile/Desktop) – Guide
How to Enable Message Logging in Discord (Even Deleted Messages)…
Google Docs Icons and Symbols Meaning – Complete Guide
Samsung Galaxy Z Fold 7 Specs Leak Reveal Some Interesting…