It ’s no enigma thatWindows 11tends to run into job every now and then . Fortunately , Microsoft furnish you with a wide range of troubleshooters that can help you deal with most of those common issue . But what come about when the Windows Troubleshooter app itself stop working or runs into an erroneous belief ? If you ’ve been bugged by a similar yield yourself , this guide has a few tips that will avail you get Windows 11 Troubleshooter not working error . So , let ’s begin .
tabular array of Contents
1. Check Path for Temp Folder
Every metre you run a troubleshooter , Windows needs to create and preserve impermanent file in the Temp brochure . However , if Windows fails to locate this folder on your PC , then the troubleshooter will not ferment correctly . To reverse this , check to see if the set path for the Temp leaflet is right .
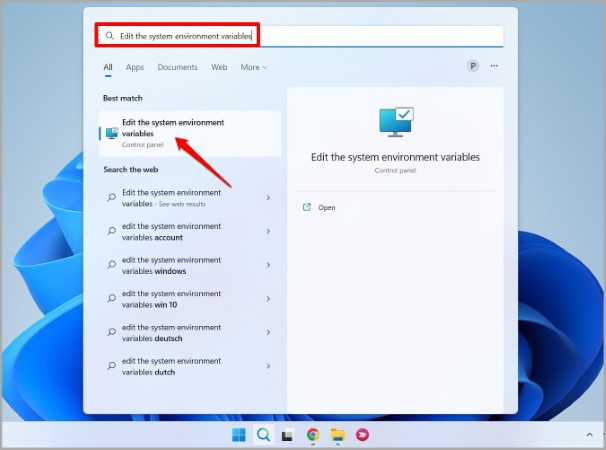
1.Press theWindows key + Sto open Windows Search , typeEdit the system environment variablesin the loge , and pressEnter .
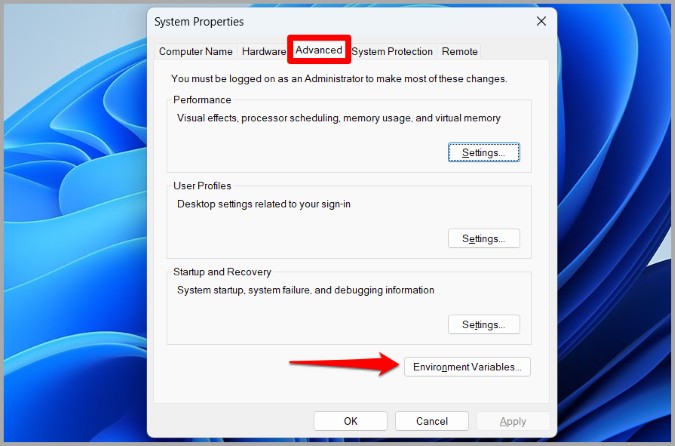
2.UnderAdvanced , chatter on theEnvironment Variablesoption .
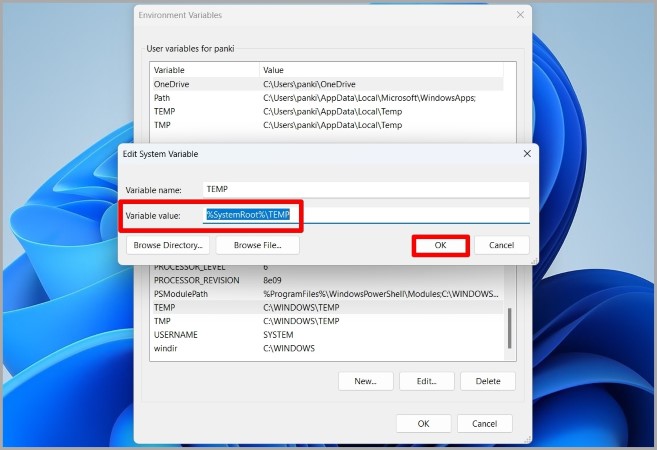
3.Under organisation variable , check the folder path forTEMPandTMP . It should be determine toC:\WINDOWS\TEMP .
If the track is set to something else , double - click onTEMPand transfer the Variable value to%SystemRoot%\TEMPbefore hittingOK . Do this for theTMPfolder as well .
reboot your Windows personal computer after this and try running the troubleshooter to see if it ’s work .
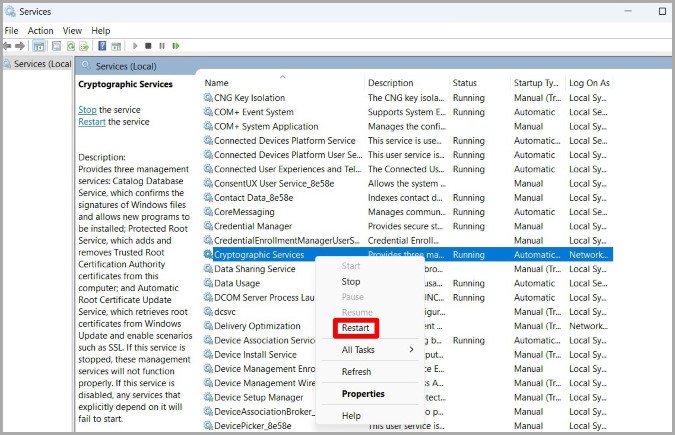
2. Restart Cryptographic Service
Cryptographic Service is a small program that want to ladder in the background for the troubleshooter to work out . If the service of process has encounter a problem , you ’ll need to restart it by following the steps below .
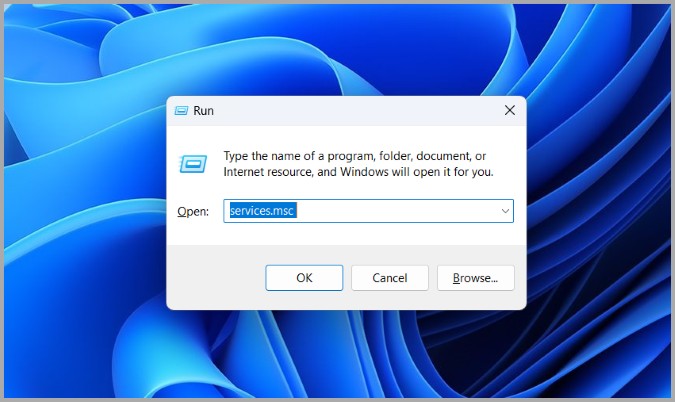
1.Press theWindows primal + Rto set in motion the Run dialog box . Typeservices.mscin the box and pressEnter .
2.Scroll down to locateCryptographic Services .

3.If the service is running , justly - select it and selectRestart . If it ’s not go , selectStart .
Check to see if the troubleshooter do work fine now .
3. Run SFC and DISM Scan
Issues with the system files on your PC can also pretend troubleshooters on Windows . That is , if some decisive system file are miss or damaged , the Windows troubleshooter may not influence as expect . you could fix this well by running an SFC CAT scan followed by a DISM scan . translate on to learn how .
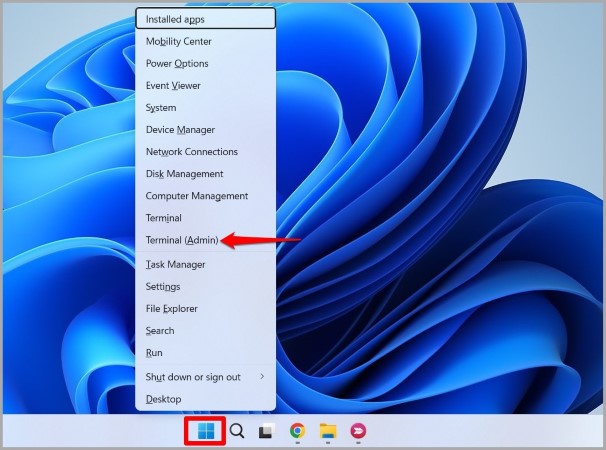
1.Right - suction stop on the Start clit and selectTerminal ( Admin)from the list .
2.Click onYeswhen the User Account Control prompt appears .
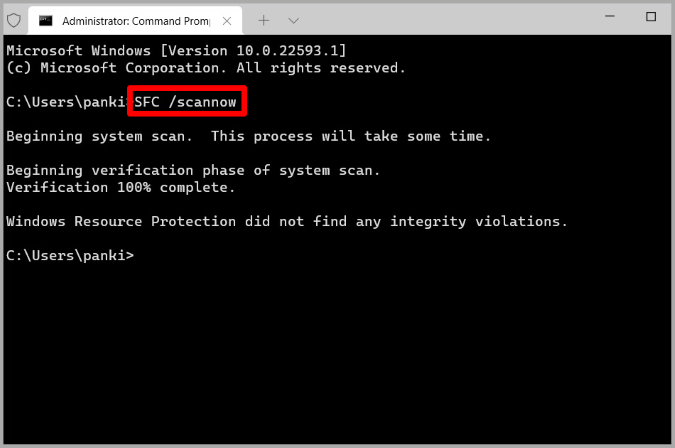
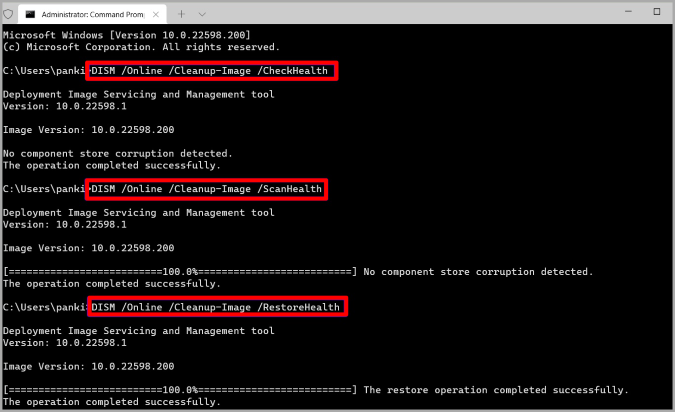
3.Type the follow program line and pressEnter .
4.After running the SFC CAT scan , melt the following command one by one .
After running the above dictation , check out to see if the Windows troubleshooter is play alright .
4. Run Disk Cleanup
At times , old impermanent files stack away on your PC can also intervene with Windows troubleshooter and keep it from working correctly . Disk Cleanup is a handy utility that can avail you get rid of those impermanent files with ease . Do n’t worry , clearing these Indian file wo n’t affect your apps or information in any way .
To execute the disk cleansing utility on Windows , follow the steps below .
1.Open theSearch menu , typedisk cleanup , and pressEnter .

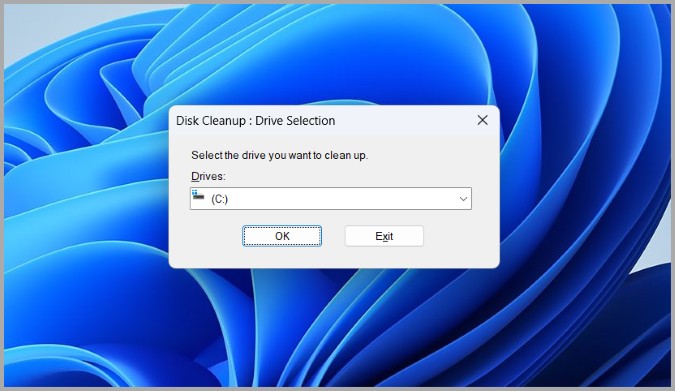
2.Use the fall - down computer menu to select theC : effort .
3.Under filing cabinet to delete , score all the checkboxes and hitOK .
4.ChooseDelete Fileswhen propel .
Once cleared , taste execute the trouble shooter to see if it work delicately .
5. Check Group Policy
Another understanding why trouble shooter may not work on Windows is if they ’re handicapped fromGroup insurance policy . In that pillowcase , you may follow the footmark below to ensure that all the users are allowed to run troubleshooters on your microcomputer . You ’ll need to be logged in as an administrator for this to knead .
1.Press theWindows key + Rto launch the Run duologue box , type ingpedit.msc , and pressEnter .
2.In the Group Policy window , habituate the left pane to sail toComputer Configuration > Administrative Templates > organisation > Troubleshooting and Diagnostics > Scripted Diagnostics .
verify that all three entries on your right hand are set toEnabledorNot configuredstate .
If any incoming is set toDisabled , you may double - snap on it and switch it toEnabledorNot configured . Then , hitApplyto economise change .
reboot your microcomputer subsequently and try running the troubleshooter one more time .
6. Run Troubleshooter in Clean Boot State
Third - political party apps and services run on your personal computer can also intervene with the Windows process . When that happens , Windows may give way to perform sure project or run into errors while doing so . To verify this , you may stress boot your personal computer in aclean boot state . Here ’s how .
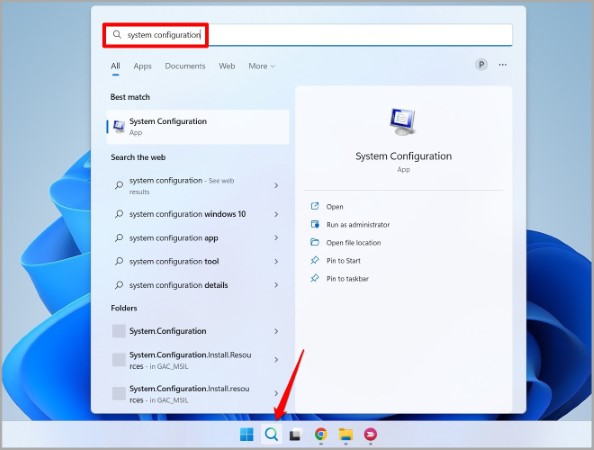
1.Open theSearch menu , character insystem configuration , and pressEnter .
2.Switch to theServicestab , and tick theHide all Microsoft servicesbox . Then , click onDisable allbutton .
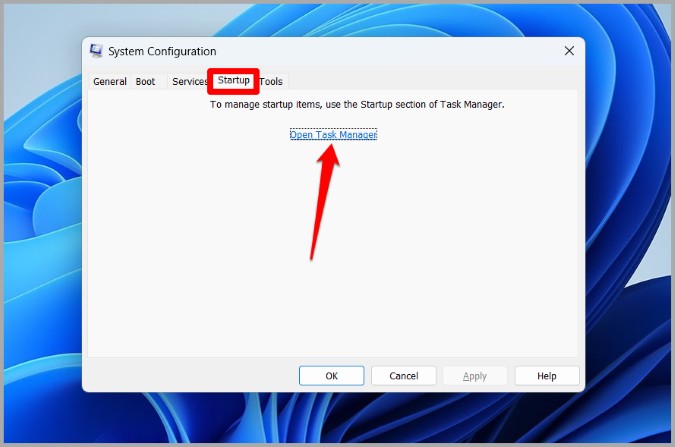
3.Head over to theStartuptab and clack onOpen Task Manager .
4.Select a third - political party syllabus and dawn onDisableat the top . echo this step to disable all third - political party apps and programs .
reboot your PC to enter the clean iron boot res publica and try running the troubleshooter again . If it works , then you’re able to be sure that the publication is triggered by a third - party app or service . you’re able to try removing any of late installed apps or programs to see if it help .

7. Perform System Restore
If removing recent apps or programs does n’t help oneself , then you ’ve no option but to perform a system restore . This will permit you to unwrap any recent change made to your PC and fix it to an other state before the trouble first occurred .
1.press thesearch iconon the Taskbar , type increate a restore point , and pressEnter .
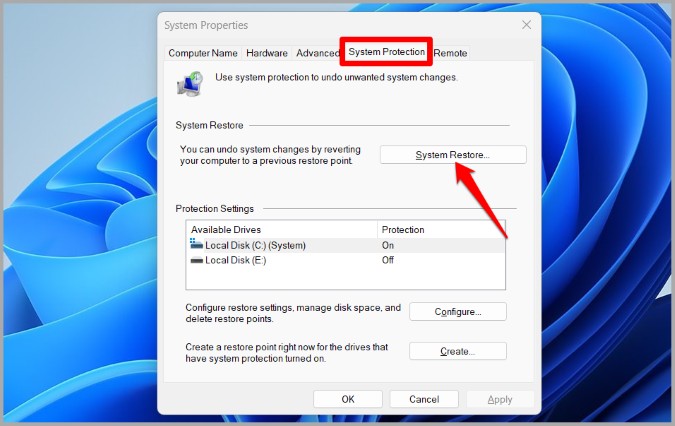
2.UnderSystem Protection , tap theSystem Restorebutton .
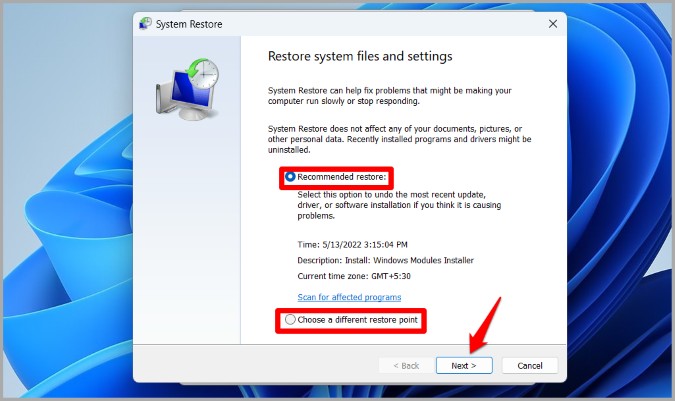
3 . you could either go with the recommend restore pointedness or select one yourself by select the 2nd choice . Once take , click onNext .
4 . Lastly , flick onFinish .
Your PC will re-start and retrovert to a late state . This should definitely end up gear up the underlie issue and get troubleshooters to lick again .

No More Trouble
It ’s easy to get confused when a public utility company that ’s meant to help you fasten problems stops play itself . Hopefully , implementing the troubleshooting tips has helped you restore Windows 11 troubleshooter and put your intellect at ease .
Microsoft OneNote Icons and Symbols Meaning – App/Desktop
50 Years of Microsoft: 11 Times Microsoft Fumbled and Missed…
How to Transfer Windows 11 to a New Drive/SSD (Step-by-Step)
Microsoft Office is Now Free on Desktop – But With…
How to Install Windows 11 on PC With Unsupported Hardware
Windows 10’s End is Near: What Are Your Options?
Windows 11 Camera Not Working? Here’s How to Fix It
Windows 11 “Resume” Feature: Seamlessly Switch Devices
Windows 11 Installation Has Failed? Easy Fixes to Try
Windows 11’s Multi-App Camera Support: How to Enable and Use…