Microsoft has made severalchanges to its apps with Windows 11 . One of these is the combination of the Snipping tool and Snip & Sketch . While the new tool combines feature from both of them , it is still referred to as theSnipping tool . If you are curious about how to use the Snipping tool in Windows 11 , we are here to help . Let ’s get started .
board of Contents
How to Take Screenshots Using Snipping Tool
The Snipping Tool allows you to capture screenshots in multiple way on Windows 11 .
1. Using App
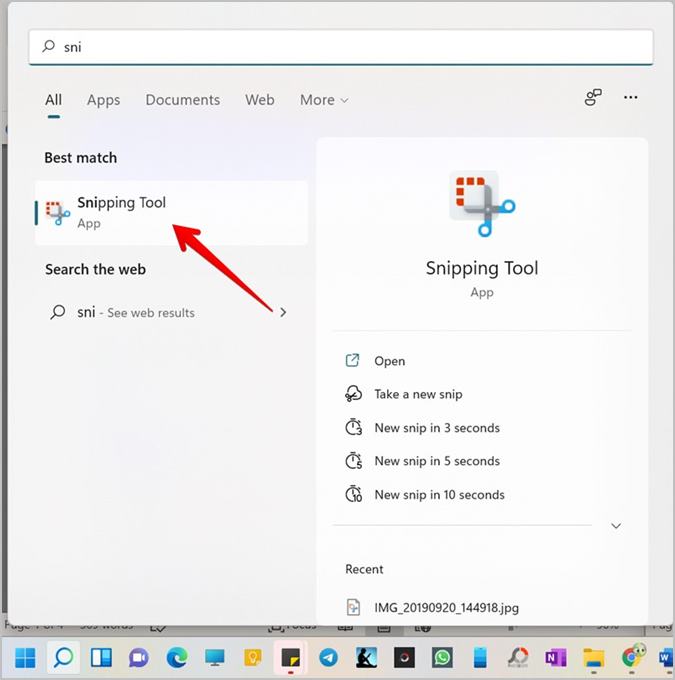
You will discover the Snipping tool under the list of apps on your Windows microcomputer . Here are the steps to use it :
1.OpenSearchand type Snip . The Snipping instrument app will appear . Click to open it . you may pin it to the Taskbar for immediate access .
In suit you ca n’t obtain the Snipping tool in Windows 11 , establish it from the Microsoft Store .
Download Snipping Tool
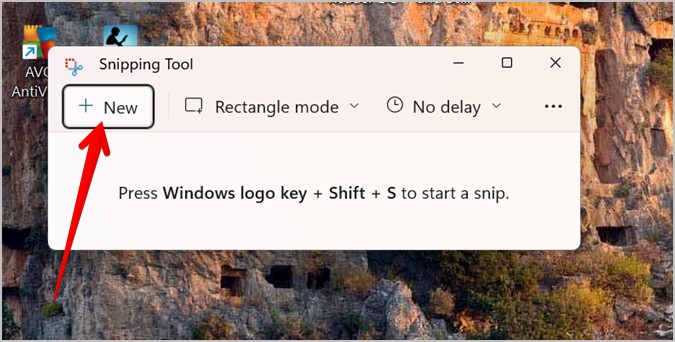
2.The Snipping tool windowpane will seem on the screen . launch the app or the windowpane that you need to beguile . tap theNewbutton in the Snipping Tool .
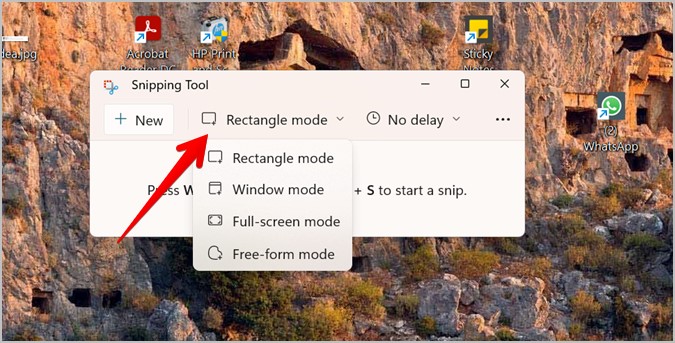
3.The cover will darken , and the snippet screen will open up with four screenshot modes at the top . These permit you define the area that you desire to conquer .
Rectangle way : This is the first one and is pick out by nonremittal . It lets you manually set the area to be captured in a rectangular form . press the screen door and then trail the black eye to catch the required area .
Freeform Snip : This style let you define the area in a loose - form manner . It does n’t put any restrictions on the selection as the selected area can be of any or no shape .
Window : This mood let you take a screenshot of any windowpane on the screen . All you involve to do is cluck on the window once and it will entrance the screenshot with just the windowpane in it .

Full - screen mode : Click anywhere on the screen to enchant a full - screen screenshot using this manner .
Tips : utilise theTabkey to navigate between these mode and pressEnterto take a modal value . Press theESCkey or come home on the Adam picture next to the manner to get out of the snipping concealment .
4.Once you capture a screenshot , it will automatically open up in the Snipping Tool editing mode . We have covered how to edit and save screenshots in the Snipping tool below .

In case you want to change the nonremittal screenshot mode for future screenshots , select theRectanglemode in the app and select the required modality from the list . When you tap theNewbutton the next time , it will automatically open up the new default mode .
By default , the screenshots are taken immediately after you select the take area . you could lend a delay of up to 10 second before a screenshot is captured . This helps in opening the postulate app / screen or doing some undertaking before take a screenshot . To do so , press theNo delaybutton in the app and pick out the hold clip .
2. Using Keyboard Shortcut
The Snipping Tool can also be activated via the keyboard shortcut . PressWindows logo key+Shift+Sto start the screenshot prick . Please keep in psyche that when you habituate the shortcut , the Snipping app will not spread ; instead , the concealment will darken and you will be taken directly to the snippet screenland . Select the required modality to capture a screenshot .
3. Using Print Screen
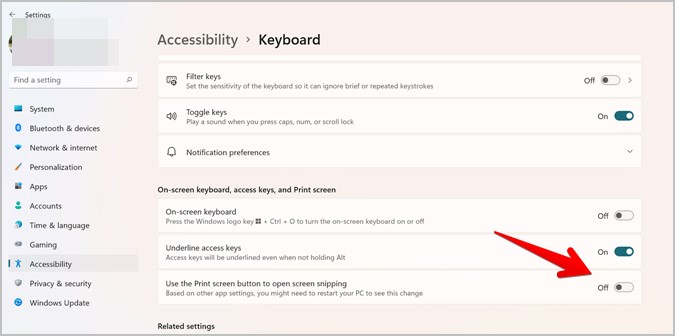
The above two methods might seem slow for capturing screenshots regularly . The better practice is to assign the Snipping Tool to the Print Screen headstone on the keyboard . Go toWindows options > availableness > Keyboard . activate the toggle switch next toUse the Print screen button to unfold screen snip .
As a outcome , when you weigh the Print Screen key , it will straightaway open up the snippet screen where you may select between different modes to captivate a screenshot .
Note : If you want to impart a time lag , use method 1 to becharm screenshots .
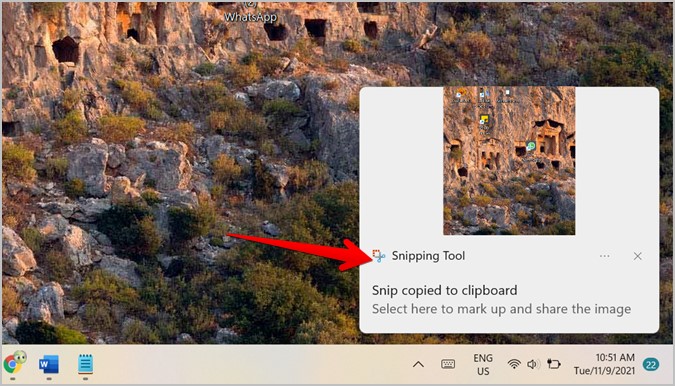
The screenshot is not automatically saved to your computer when using the last two methods . Instead , a notification will appear on your computer when you capture a screenshot . sink in on it to open it in the editing mode of the Snipping Tool . If you do n’t see the notice or you missed it , go to Action Center and wait for the Snipping tool notification .
what is more , the screenshot is copy to the clipboard . you may glue it immediately into any app of your pick , such as Paint , Word , Google Docs , and so on , without having to give it in the Snipping Tool first .
Tip : Check out more way of life totake screenshots on Windows .

How to Edit Screenshots in Snipping Tool
You will find a bit of editing tools in the top bar of the Snipping Tool . Let ’s check into how to expend them to edit screenshots .
Draw on Screenshots
The Snipping app provides a ballpen playpen and highlighter tool to gloss on images . When the prototype opens in the Snipping Tool ’s redaction mode , cluck on theBallpoint or Highlightertool to activate one of them . Then start line / writing on the screenshot . Double get through on the cock to adjust the playpen size and color options .
Erase Annotations
To remove any drawings from the image , tap theErasertool and use the mouse / digit to off annotations . To wipe off all the annotations , doubled - tap the Eraser shaft and selectErase all ink .
Use Ruler and Protractor
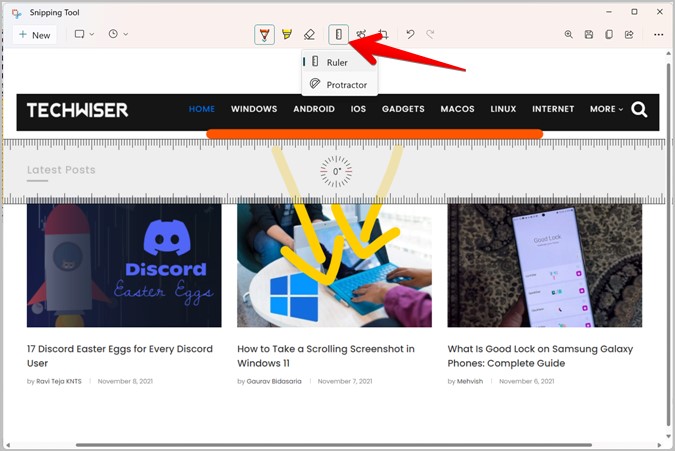
The Snipping Tool does n’t offer a native path to draw straight lines or circles . you could use the ruler and protractor tools for the same purpose . However , only one dick can be used at a time .
To start the ruler , get across on theRulericon in the carte Browning automatic rifle . The ruler will show up on the image . To use a protractor , double - clink on theRulericon and selectProtractorfrom the fare .
get behind the ruler or protractor to change its office . To change their angle , hover the mouse cursor over the instrument and apply the computer mouse scroll taproom to change its slant . Use the playpen or highlighter cock and draw along the ruler or protractor edge to get a unbowed product line .
To obscure swayer or protractor , double - clink on the Ruler ikon followed by clicking on the dynamic prick . That will hide out it .
Enable Touch Writing
If you have a touch - enable equipment , cluck on theTouch - writing(hand ) icon to activate touch written material mode . Now you could write on the image with your finger .
Crop Screenshot
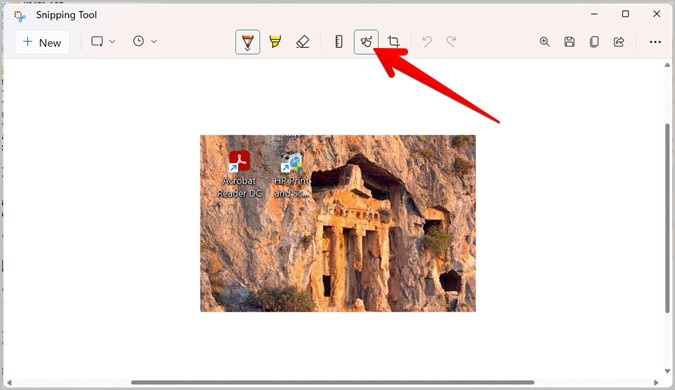
If you have captured an extra expanse in your screenshot , use the Crop tool to polish off it . penetrate on theCropicon to enter the cropping modality .
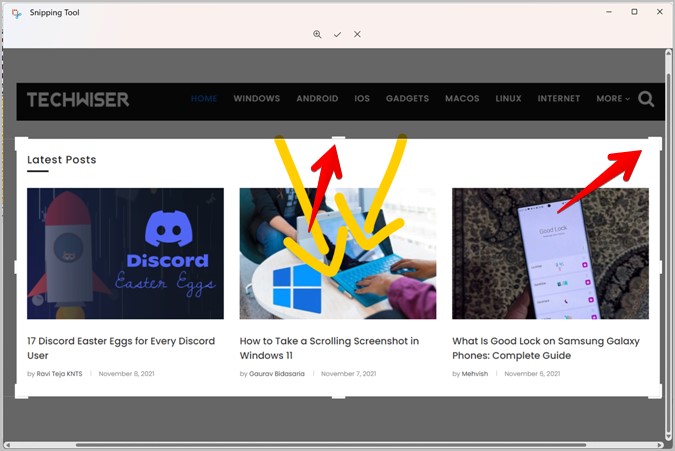
take the need sphere by embroil the edges using white bars . tap the checkmark icon or press the Enter key fruit to confirm the survival of the fittest .
Save Screenshot
Once you are done blue-pencil the screenshot , press theSavebutton or expend theCtrl+Skeyboard crosscut . The Save as window will open . Give a name to the screenshot and save it at your preferred terminus .
Bonus Tips to Use Windows 11 Snipping Tool
1. Edit Old Screenshots
If you care the redaction pick provided by the Snipping Tool , it lets you spell old screenshots or other images in the redaction prick . Launch the Snipping peter app and snap on thethree - doticon . ChooseOpen Fileand choose the image that you want to edit .
2. Open Screenshot in Another App
you could directly launch the screenshot from the redaction mode in a different photo - editor app . For that , select thethree - doticon in the Snipping instrument and selectOpen with . Choose the desired app .
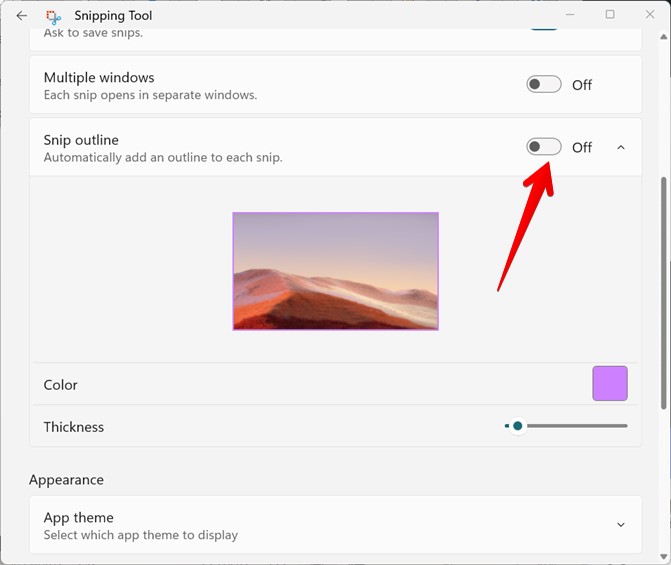
3. Add Outline to Screenshots
If your screenshots need a molding , you could add them automatically using the Snipping Tool . Go to theSnipping Tool Settingsfrom the three - dot icon and activate the toggle next toSnip lineation . Also , come home on the pointer next to the on-off switch to alter the outline colouring material and thickness .
4. Enable Multiple Windows
If you want each screenshot to open in a fresh windowpane rather of replacing the existing screenshot in the tool , enableMultiple windowsto toggle in the Snipping Tool options .
Do More With Screenshots
The Snipping Tool in Windows 11 is an amazing utility program to bewitch and edit screenshots without any third - company apps . lamentably , it does n’t let you charm scrolling screenshots . Find out alternate way totake scrolling screenshots in Windows 11 . Also , learn how totake a screenshot by including a mouse pointerandcapturing a screenshot of the login screen .
Microsoft OneNote Icons and Symbols Meaning – App/Desktop
50 Years of Microsoft: 11 Times Microsoft Fumbled and Missed…
How to Transfer Windows 11 to a New Drive/SSD (Step-by-Step)
Microsoft Office is Now Free on Desktop – But With…
How to Install Windows 11 on PC With Unsupported Hardware
Windows 10’s End is Near: What Are Your Options?
Windows 11 Camera Not Working? Here’s How to Fix It
Windows 11 “Resume” Feature: Seamlessly Switch Devices
Windows 11 Installation Has Failed? Easy Fixes to Try
Windows 11’s Multi-App Camera Support: How to Enable and Use…