Discord is doubtless one of the most famous social medium platforms for gamers surmount Skype , TeamSpeak , etc . Most games have their own server on Discord for their fans to watch , but the unspoilt part is you’re able to make a server for your residential district on your own . A Discord waiter is like a group Old World chat on steroids plan to get in contact with your residential area . Here is how you could make a waiter on Discord . rent ’s begin .
In this article , we ’d take a look at the steps on how to create and effectively manage a Discord Server . I would explain what every feature of speech does and why you should or should not enable it .
1. Creating a Discord Server
Creating a Server on Discord is pretty dewy-eyed , Justopen theDiscord site or download the Discord app ( Windows , Mac , Linux , Android , or iOS ) and logarithm - in .
If you are logging in for the first time , you will get a pop - up asking you to make or fall in a waiter . If you are already a Discord user , justclick on the “ + ” image on the bottom left to go . There is also a way to make Discord Server from existing templates , to do that , you could commence fromhere .
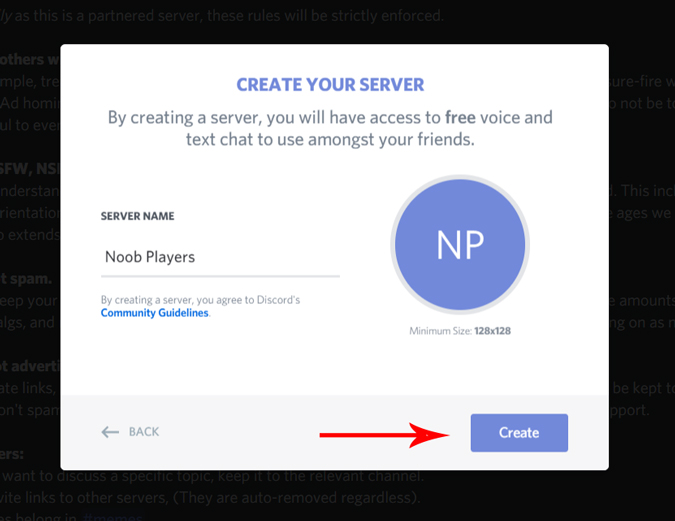
It would open a Modern popup , tap the Create a server button .

Fill out the essentials such as Name of your Server , and mayhap a Picture . If you ’re not sure about the picture you’re able to skitter that , for now . penetrate the “ Create ” buttonto proceed .
Also Read : How to commute Fonts in WhatsApp chat
That ’s it , you have successfully created your first Discord server . Discord would motivate you to invite friends to your server . you’re able to go ahead and invite your discord Friend or skip it for later .

2. Adjust Server Settings
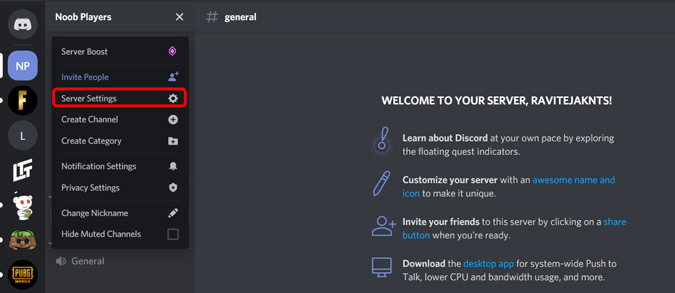
To customize the server configurations , right - clack on the server name at the top -left corner and press Server configurations alternative . We ’ll focus onOverview , Moderation and Interactions section .
foremost , in the overview section , you canenable the AFK canal and AFK timeout . Discord would automatically move people to AFK channel if they are wild for long than AFK Timeout . This would come in handy when you desire to optimize the server and do n’t want people who are n’t interacting enough .
Now , you could scroll down andchange the nonpayment notification options from all messages to only mentions , so that people do n’t get disturbed by all the substance on your host .

In the temperance discussion section , you canchange the substantiation level and content filter on your waiter . If you just have Friend on your explanation , you could set it as “ Do n’t scan any medium content ” , but if your server is going to be public , it ’s best to scan spiritualist content for inappropriate depicted object .
finally , On the Interactions pill , you canconnect your other accounts such as YouTube , Steam , Reddit , etcto your Discord .
Also Read : How to use clownfish as existent - clip Voice changer for Discord
3. Adding People to your Server
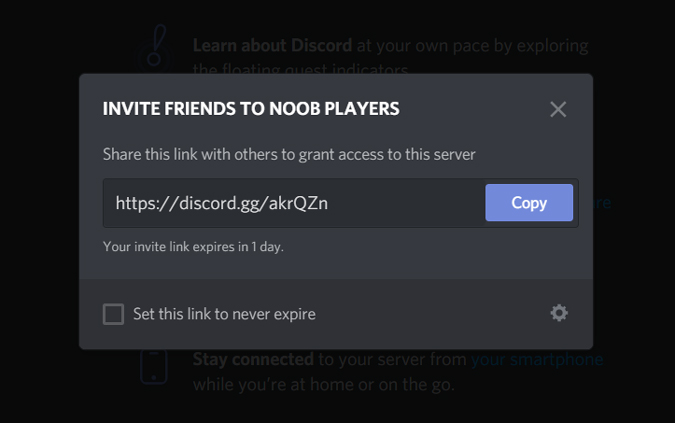
To add masses to your waiter , just tick the host name on the top left over andselect Invite People .
Discord will generate a link , you could partake it to your acquaintance via Email , WhatsApp , iMessage , etc .
4. Managing Roles on your Server
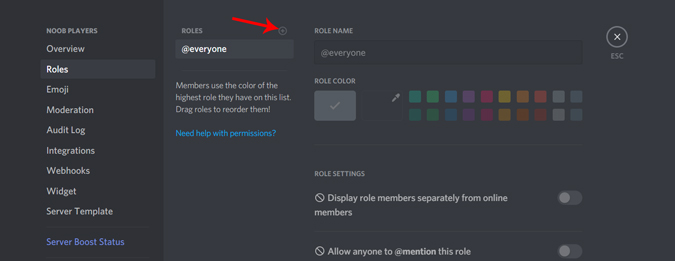
To wield roles on your host , you may just flick on server name > Server mount > Roles and click the positive ( + ) symbol to total a novel role.a
The roles are basically titles given to specific members of your server that define what they can control on the server . The preferences are reasonably straight forward , all you need to do is set a designation and color , and allot what they can do on your server .
Now you have part on your server . you’re able to fill in these roles by navigate to Server configurations > Membersand you may see all the members on your waiter . Just ClickPlus ( + ) symbolization beside the name and select the role for the member .
5. Creating Channels and Categories
AChannel is nothing but a chat area for all the people to talk on that waiter . There are 2 types of duct , a text TV channel , and a spokesperson channel . multitude create multiple channels for various purposes .
There are channel to talk about Builds , textures , beta version , various Minecraft apps like Dungeons and Earth , technical reenforcement and normal chat for Minecraft players . Voice channels are mostly used to communicate with people on the waiter while on the game . Admins also create channels for ruler to follow on their server , FAQ , announcements , and channel list to explain about all the channels in that server .
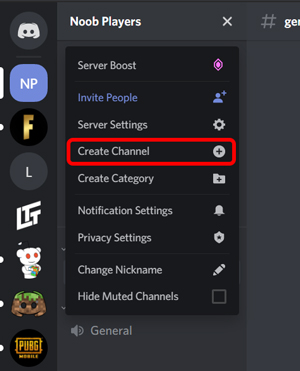
So , to create a channel in your server , chatter on the server name at the top - go forth street corner and flick onCreate Channel .

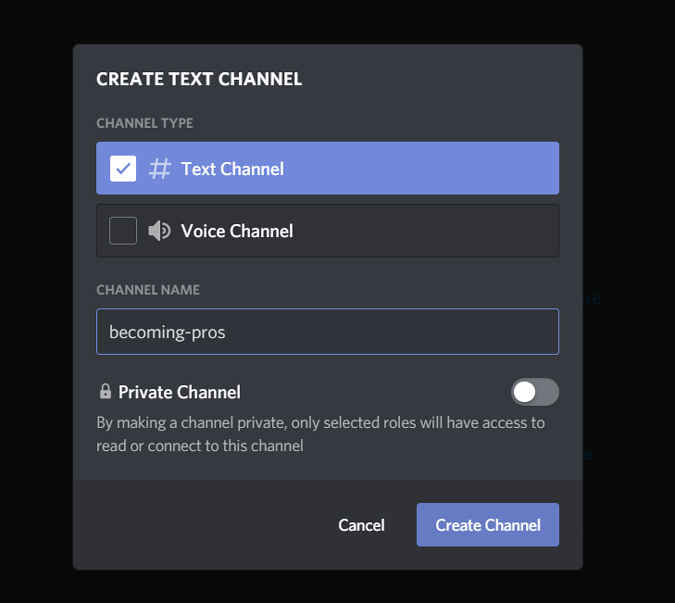
Select the type of channel you desire to create , give it a name , and snap Create Channel . you may also make it secret so that hoi polloi with invites can take part .
Coming to Categories , you could make Categories by select the Server name at the top - leave corner and click Create Category . The Categories department let you segregate your canal based on Context .
Give your class a Name and click Create Category . Now , you’re able to just drag your channels into different categories so that you’re able to track them easy .

6. Boosting your Server for more features
found on your Server ’s popularity and interaction , Discord would unlock exceptional feature for your Server . you could contain out your host status anytime by get through on the waiter name > host options > Server Boost Status . As your server grows , you would get extra fringe benefit sole to your grade .
Final Words
Related : How to Play Retro Games on Steam Using Steam ROM Manager ?
38 Google Earth Hidden Weird Places with Coordinates
Canva Icons and Symbols Meaning – Complete Guide
What Snapchat Green Dot Means, When It Shows, and for…
Instagram’s Edits App: 5 Features You Need to Know About
All Netflix Hidden and Secret Codes (April 2025)
All Emojis Meaning and Usecase – Explained (April 2025)
Dropbox Icons and Symbols Meaning (Mobile/Desktop) – Guide
How to Enable Message Logging in Discord (Even Deleted Messages)…
Google Docs Icons and Symbols Meaning – Complete Guide
Samsung Galaxy Z Fold 7 Specs Leak Reveal Some Interesting…