Are you working on a confidential document in Microsoft Word ? you’re able to password - protect the Word file or even good , apply a custom ‘ Confidential ’ or ‘ secret ’ watermark to it . By doing so , you may ensure that other squad members remark the watermark and care the document with precaution . translate along to learn how to lend oneself a watermark in Microsoft Word and how to create a template out of it for easygoing entree in the time to come .
Create a Watermark in Microsoft Word
Microsoft offers a built - in peter to create and tot up a watermark to a text file . One can also integrate a ikon as a watermark and create a personalized document .
Apply a Text as Watermark in Microsoft Word
1.Open Microsoft Word .
2.Open a document on which you want to tote up a watermark or create one from scratch .
3.Go to theDesigntab in the Word carte legal profession .

4.SelectWatermarkfrom the following sliding menu .
5.You have two options to choose from – PictureandText .
6.Click onText .
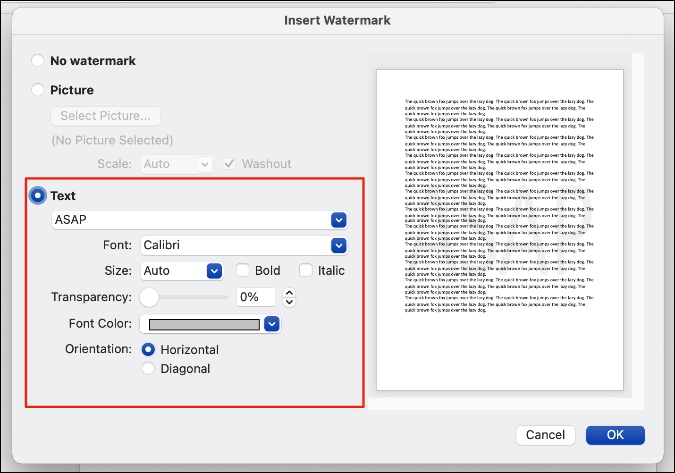
7.By default option , the text area show up ‘ ASAP ’ . select the pearl - down menu next to Text and it will showcase the build - in words to add as a watermark .
8.One can also add a custom schoolbook as a watermark in the Word text file . tick on the default schoolbook and add a custom textbook as a water line .
As for the editing pick , you have the option to change the font style , sizing , color , and orientation of the water line . you may also play with the sheer and italic options .

If the added water line is interfering with the document text , you should play down the water line outcome with the built - in transparency option . Either set the transparency portion or use the up / down arrow to change the transparence of the watermark .
By default , the transparency is set at 0 % . In brusque , users have total control over the tone , find , size , and posture of the watermark in Word text file .
Add Picture or Logo as Watermark
Using the same trick above , one can lend oneself a company logo or brand identity operator as a watermark in Microsoft Word too .
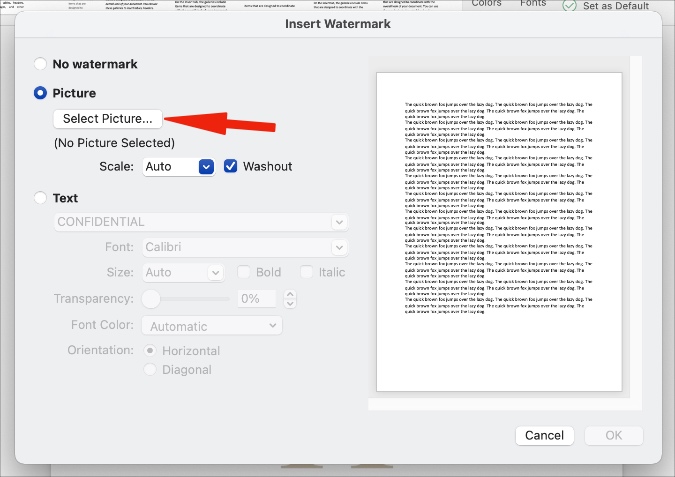
1.From the same Watermark card in Microsoft Word , selectPictureinstead of textual matter .
2.press Select Picture and add a image or logo from the twist .

3.you may play with the scaling and washout option and see a live preview of the watermark from the good side .
By default , the applied water line is sic right in the middle of a Word Sir Frederick Handley Page . If you want to resize it or place it in a corner , you need to edit the watermark . Here ’s how to do it .
Edit Watermark’s Size and Position
You need to utilise the Header & Footer menu to blue-pencil the water line ’s sizing and position . Go through the steps below to make changes .
1.SelectInsertin the menu saloon .
2.Go toHeader > Edit Header .
3.It will give the editing interface to make changes .
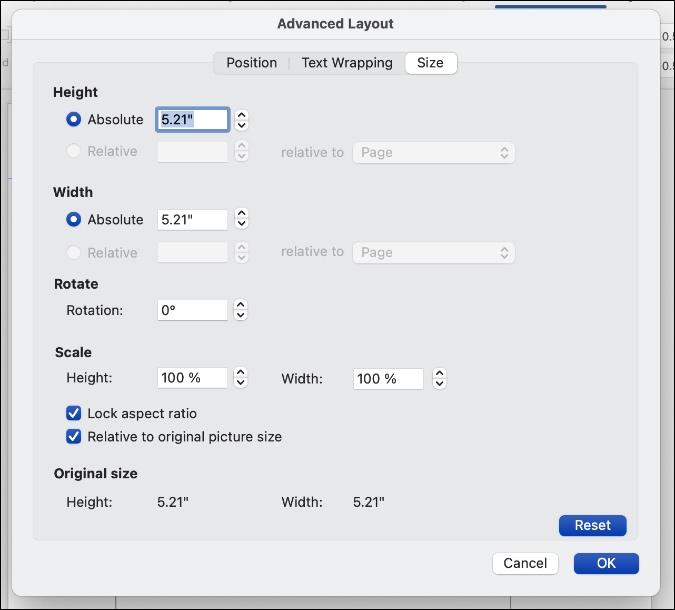
4.Right - snap on the water line and selectSize and posture .
5.From the following menu , you could change the water line ’s height , width , rotate it to a degree , and playact with the grading option .

6.Make relevant change and you are good to go .
Now you’re able to simply drag and neglect the water line to a desired property on the page . Most hoi polloi keep it at the bottom correct corner of the page . The same watermark size and place change will apply to all the pages on the Word document .
How to Remove Watermark
Do you no longer need the watermark on a Word document ? you’re able to easily remove it by postdate the steps below .
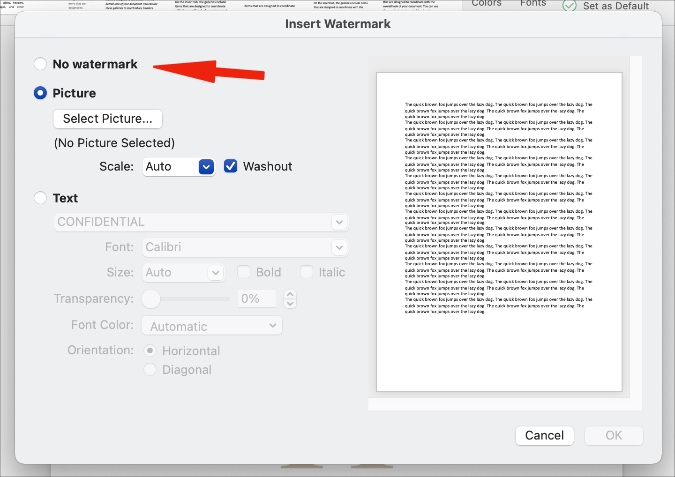
1.launch the Word papers and go to theDesign > Watermarkmenu .
2.SelectNo Watermarkoption from the succeed menu and hitOkat the bottom .

That ’s it . You have successfully removed the water line from a Word written document .
Save Watermark as Template
Do you frequently need to use a specific watermark on Word documents ? alternatively of going through lengthy steps to contribute and edit watermarks on every Word document , you may save the document as a template . Here is how to do it .
1.Make all the relevant change to a papers , apply a watermark , change its color , size of it , and position as noted in the above steps .
2.Click onFileoption in the menu bar and selectSave as guide .
3.Give it a relevant name and hitOkat the bottom .
From now on , whenever you require to use the same watermark , merely get to the template gallery and search for the produce guide . You will see the watermark - ready Word document to employ .
Wrapping Up: Personalize Microsoft Word Document With Watermark
Go through the steps above and add a watermark to a Word document . If you need to use the same water line ofttimes than ever , do n’t forget to save it as a template in the Word drift . The TechWiser team mostly use the company logotype as a watermark in a Microsoft Word text file .
Microsoft OneNote Icons and Symbols Meaning – App/Desktop
50 Years of Microsoft: 11 Times Microsoft Fumbled and Missed…
How to Transfer Windows 11 to a New Drive/SSD (Step-by-Step)
Microsoft Office is Now Free on Desktop – But With…
How to Install Windows 11 on PC With Unsupported Hardware
Windows 10’s End is Near: What Are Your Options?
Windows 11 Camera Not Working? Here’s How to Fix It
Windows 11 “Resume” Feature: Seamlessly Switch Devices
Windows 11 Installation Has Failed? Easy Fixes to Try
Windows 11’s Multi-App Camera Support: How to Enable and Use…