Although file sharing has come a farseeing way , there is still no single way of life or service which can execute all necessary of each and every drug user . So , come with us as we speak about the various ways in which you’re able to transmit Indian file between Mac , be it your own devices or with a friend ’s equipment .
Read:10 Ways to apportion Files between Two Windows Computers
Transfer Files From Mac to Mac
1. Online Services
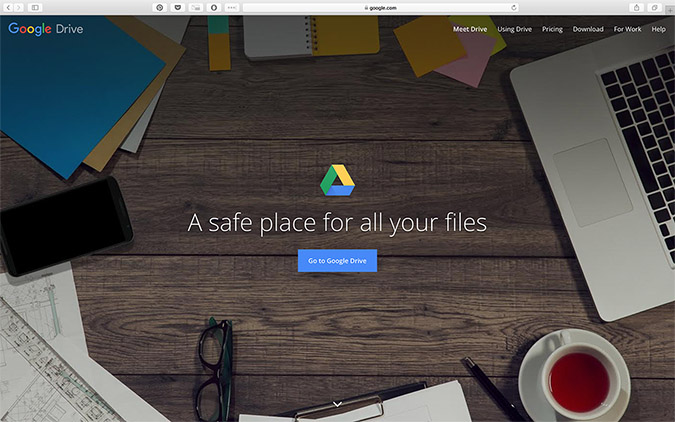
Cloud storage services are a viable alternative for file communion if you have a mellow - upper net link . These service or websites allow you to host your pictures , videos and all type of file on their servers and all your Indian file can be accessed from anywhere in the world with a reckoner connected to the internet . Cloud depot is extensively used as backup solution by many people and they can even be used to partake in files with other citizenry just by direct them a link to the host filing cabinet .
Some of the democratic cloud storage Service include – Dropbox , One movement , andGoogle driveetc . All of them pop the question 10 - 15 GB free computer storage once you sign up . If you need more storage outer space , you need to upgrade to a paid reading , which usually cost $ 3 - 4 per month for 100 gibibyte . All of these also hail with smartphone guest , making all your files approachable even from your or your friend ’s phone .
If you desire to portion out big files with your client , but do n’t want to pay for a service , then trypCloud . As of compose this post , the run version the limit is 20 GB .
However , if the file to be institutionalize is very little in size ( less than 30 M ) , you’re able to also consider sending easy via emailing service like Gmail , Yahoo , Outlook , etc .
Read:7 Ways To Access Your Computer ’s Files Remotely Over the cyberspace
Pros :

Cons :
Conclusion : Although all the cloud overhaul offer plans , most provide a free limitation ( unlike for each ) which should be enough to share files . Cloud offer you the ability to apportion file with devices or people with whom it is not physically potential to be with .
2. Physical Devices
strong-arm storage twist such as pen drive , external backbreaking disks ( HDDs ) , Solid State Drives ( SSDs ) have risen in popularity over the last few year owing to the ease of file share-out they offer . Just unite the equipment to the sender ’s Mac , copy the files to it and then connect it to the receiver ’s Mac and then replicate from the equipment to the computer . Pen Drives are unspoilt for a quick transferee of little Indian file , HDDs are great for sharing very large files ( upto 4 TB ) and also backing up your figurer . And if you need something more compact and much faster , SSDs will do the job pretty well but they do come at a monetary value compare to hard disks .
Another keen thing about them is that you could also use these devices to not only share file between two Macs but even Windows and Android gimmick ( usingan OTG cable or adaptor ) .
However , if plugging in a difficult campaign is too much work for you , consider getting a Wi - Fi campaign like this one fromScanDisk . They cost more than the physical Hard Drive and offers less reposition , but comes with the convenience to access those files over the meshing .

Quick Tip : Before using the same HDD with MacOS and Windows , check that to format it to exFAT or FAT32 as Window ’s nonremittal NTFS is read - only on MacOS and might cause problem .
Read : How to Format Hard drive
end : Physical storage gadget are better than cloud service for storing or transferring huge amounts of files as they offer a honest smash for the buck and they even work without an net joining while being portable to take with you . However , keep in mind , they still have to be physically given to the pass receiver which should n’t be a job if you are sharing with yourself or with a friend at schoolhouse or body of work .

3. File Sharing
Of naturally , most of you knew about the previous two ways , but very few know of the File Sharing System built right into Mac OS . File Sharing , which use SMB , is one of the most efficient and riotous ways in which you could transplant filing cabinet between two Macs on the same connection .
Read : How to get at your Computer Files From Anywhere With TeamViewer
But first , you need to activate File Sharing on the Mac from which you want to access data . Go toSystem Preferences > share-out . Turn onFile Sharingby clicking on the radio button next to it .

Under “ Shared Folders ” , take or add the pamphlet which you need to partake , and under “ Users ” , you may manage the access rights of various users . Make certain the icon is unripened and says “ File Sharing : On ” and under it there should be your twist ’s address bulge with “ smb:// “ which in my casing is : “ smb://anurags - mbp ”
Now on the other machine , go toFinder > Go > Connect to Server
And type in the smb speech . Next , there should be a pop - up ask you for which folder you want to open . pick out the required brochure and input the username and password of the exploiter of the host computer and you are skilful to go .

QuickTip : If you need the fastest conveyance speeds , we urge tie in both the devices to the web via wires . Also , if you want to portion out with Windows computers , go to Options and turn on afp along with smb .
Conclusion : If you require to transfer files between your own computers or to a admirer ’s computer connect to the same electronic web , File Sharing offer faster transfer speeds and even offers direction of access right for the various client .
4. Using Wires
Most of the young Macs come with Thunderbolt ports which offer insane bandwidth , but did you know you may apply them solely just for File Transfer ? There are two way in which you’re able to do so : Target Disk Mode or Thunderbolt Bridge .
Target Disk Modeallows you to get at the whole hard saucer of one Mac from another Mac , allowing you to copy files to and from the target gimmick . Using all the lane of the Thunderbolt wire , you get the fastest velocity and this method is extremely recommended for moving huge files , which is done in a New York minute .
To expend Target Disk Mode , on the fair game machine , that is the political machine who ’s the hard drive you want to get at , join both mac with FireWire orThunderbolt cable . you may buy it off virago for $ 20 ( the apple fund deal it for a eminent price ) . Next , go toSystem Preferences > Startup Disk > Target Disk Mode . This should melanise out the concealment and display a Thunderbolt icon , after which you’re able to connect the two devices using a Thunderbolt cable and the target motorcar ’s voiceless disc should appear under “ Devices ” in Finder .

Using aThunderbolt Bridgeis also very standardised , except that both the political machine stay twist on and you may use both the Macs while the file transportation is taking place .
To use Thunderbolt Bridge , you need to enable it on both the devices . Go toSystem Preferences > web > select Add(+ ) > Select Thunderbolt Bridge
Note : You may already have Thunderbolt Bridge enabled . In that case , no need to do anything .
Connect the two Macs via the Thunderbolt cable system and you should see the “ Not unite ” change to “ ego - Assigned IP ” . Once that is done , note the IP computer address and go toFinder > Go > Connect to Server . And input the IP address after which it is the same as File Sharing .
QuickTip : If you are using an old Mac which does n’t have Thunderbolt , you could use Ethernet cable television ( will work also with an Ethernet Adapter ) , to attain exchangeable transfer speed .
ending :
This is the only flying and convenient way to transfer huge file like video files and game from one Mac to the other . However , as they need to be connect with a undivided cable length , the machines need to be physically close to each other ; this might not be a problem if one is a MacBook , but it might be troublesome to do this with two iMacs in unlike rooms .
5. AirDrop
AirDrop might be the easiest and most commodious way to share files between two Macs and even iPhones . It basically uses WiFi and Bluetooth to connect and transfer files between the machine .
What makes AirDrop so great is the fact that it is so simple and idiot - trial impression ; just open AirDrop from Finder on both your Macs and wait for the other someone ’s equipment to show up . Once you could see their twist , just drag and drop the files you require to send on their embodiment / icon and Bam ! File transferred ! There may even be multiple devices , just drag the appropriate file to the appropriate soul , that ’s all it take ! It is wicked tight for modest files like pictures and text files , however for much big sized single file , it does take a footling time .
say : Best Airdrop Alternatives for Android , iOS , and Windows
Conclusion : If you’re able to use AirDrop , that is the other Mac is in your vicinity , then you should be using AirDrop as it cater the most bother - gratis experience of divvy up Indian file between two Macs .
Wrapping Up: Transfer Files From Mac to Mac
If the two Macs are in the vicinity of each other and the file cabinet to be transferred is comparatively small , AirDrop is your best bet . However , for larger files , bombshell cables or File Sharing seem to do the business just pure . And if the two machines are not in law of proximity , physical storage devices can be used to carry the files from one Mac to the other and for even larger distances , online table service are the mode to go .
