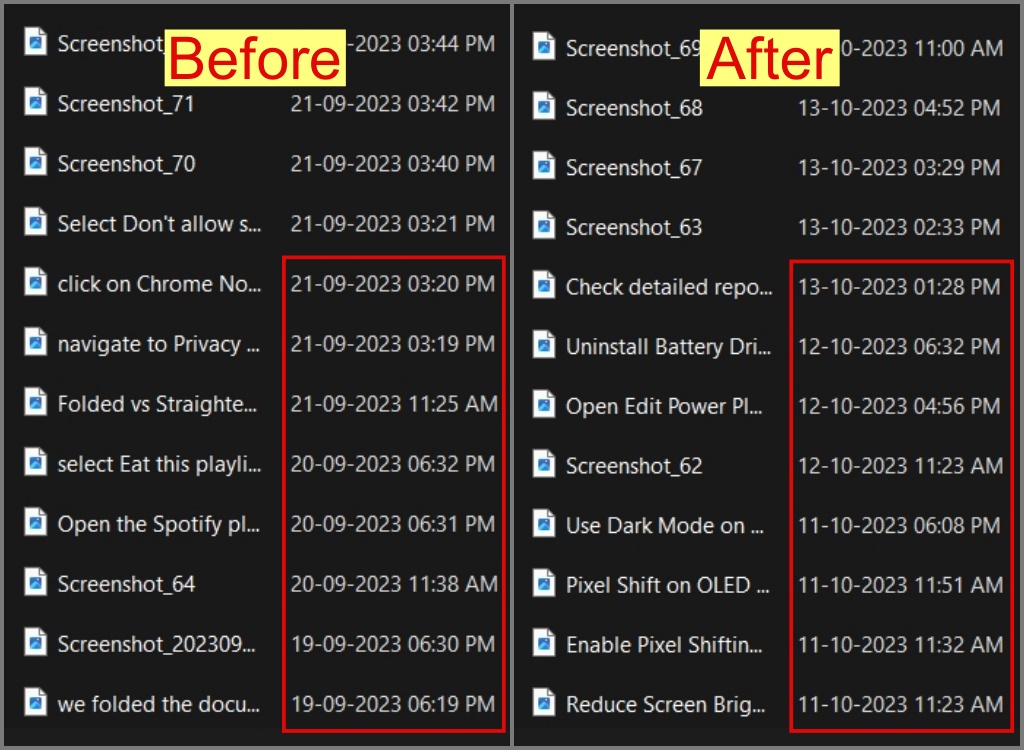
If you oftendownload filesorcapture screenshotsbut forget to erase them after use , your figurer ’s repositing can speedily become littered . So , what ’s the resolution ? Well , we have three simple methods to aid you mechanically delete older file cabinet on your Windows PC . As a matter of fact , our laptop is also filled with superannuated screenshots and document , so we will be using that as an example to show you how to auto - delete old files on Windows in the ground .
Table of Contents
Pros and Cons of Auto-Deleting Files
Like every engineering science , automobile - edit filing cabinet also have its advantage and disadvantages . Here are some professional and cons to study :
pro :
Cons :
1. Using Storage Sense
One of the simplest method we recommend to any beginner or less technical school - savvy user would be to apply the Storage Sense feature on their Windows PC . It is simple and leisurely to use and with it , you’re able to easy manage most of the temporary files and download single file that have been living under the hood for ages inside your computer .
Here ’s how to configure Storage Sense :
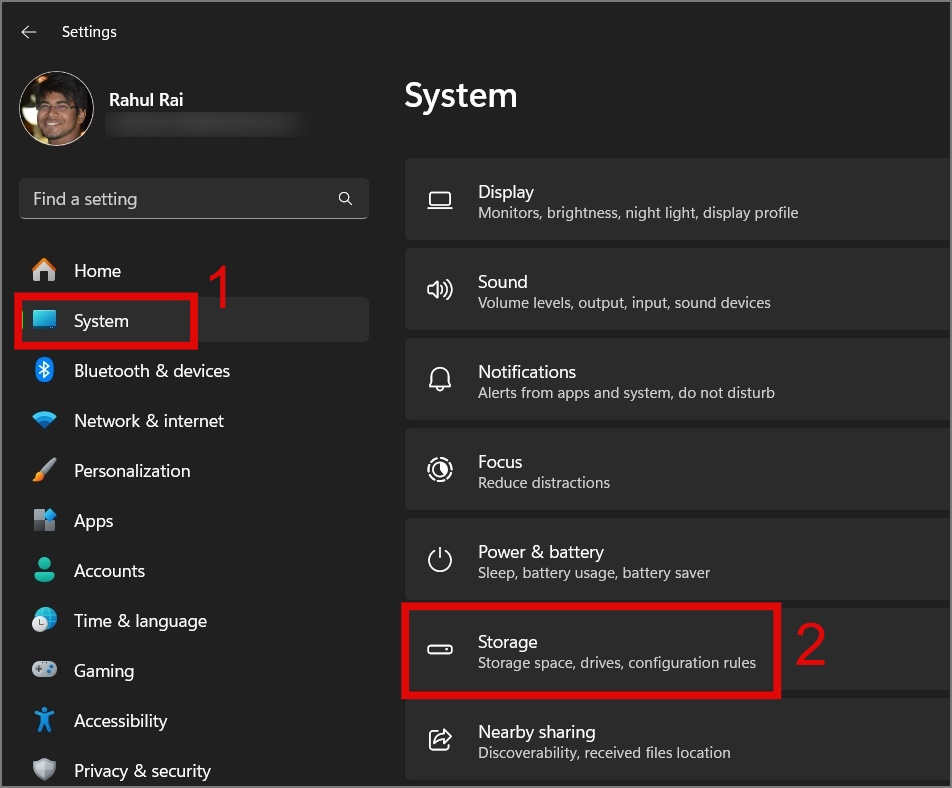
For Windows 11 :
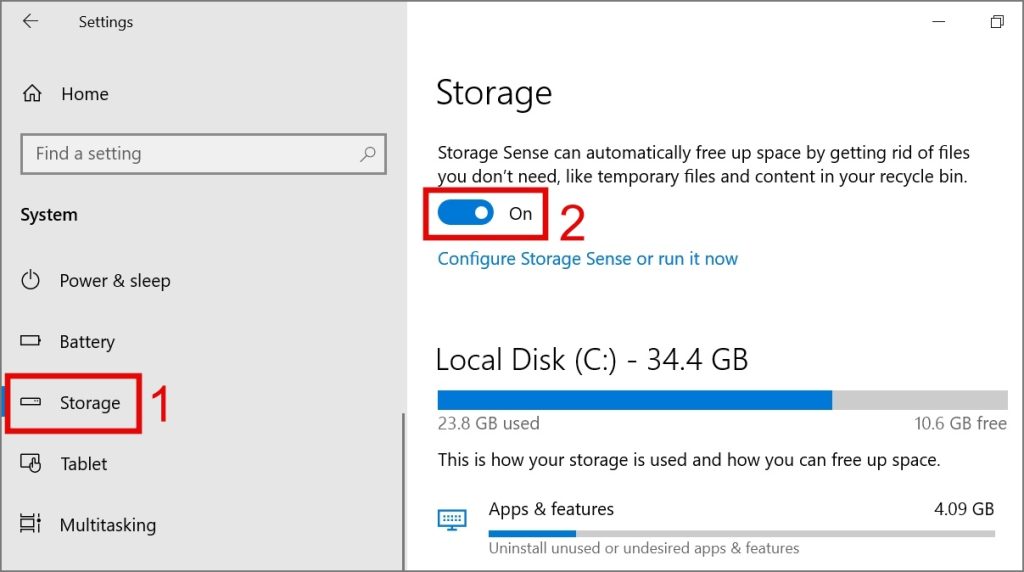
1.Go toSettings ( Windows Key + I ) > organisation > computer storage .
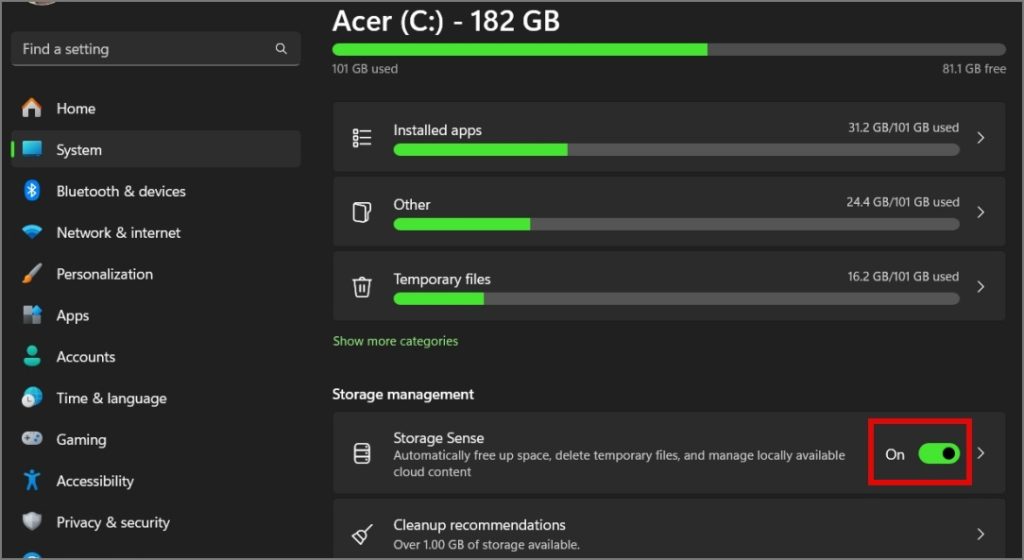
2.Next , enable theStorage Sensetoggle .
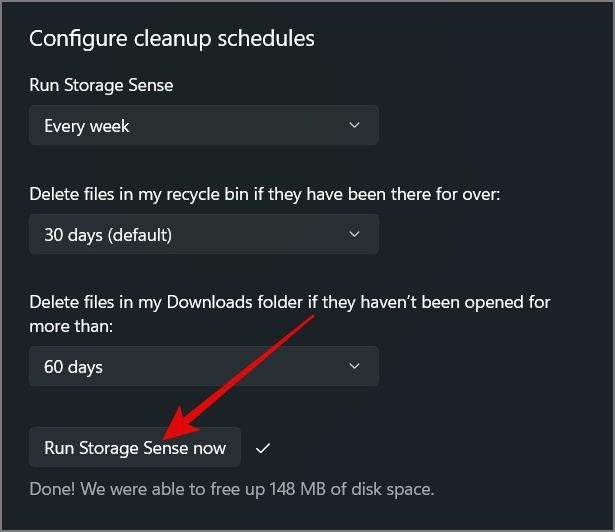
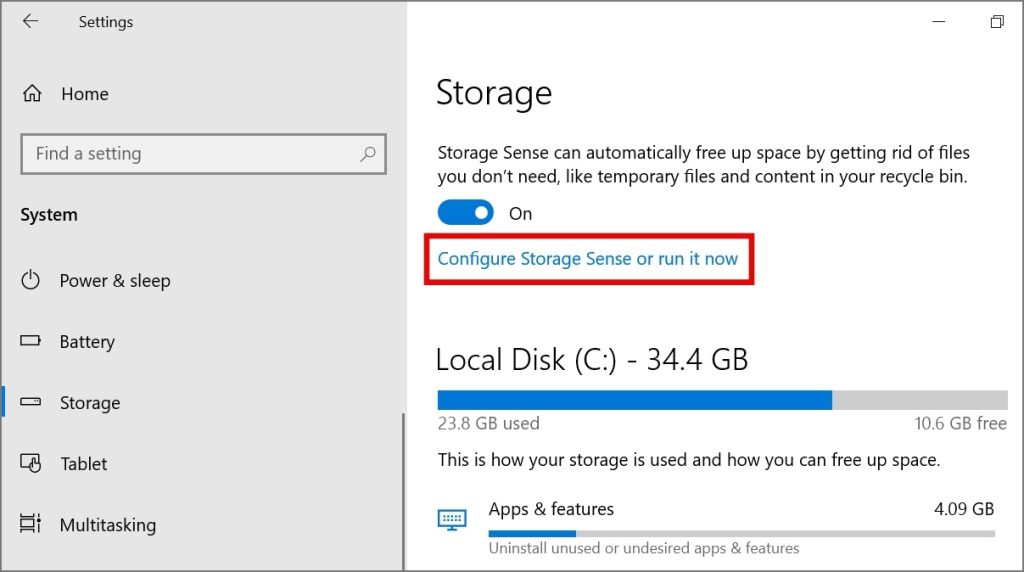
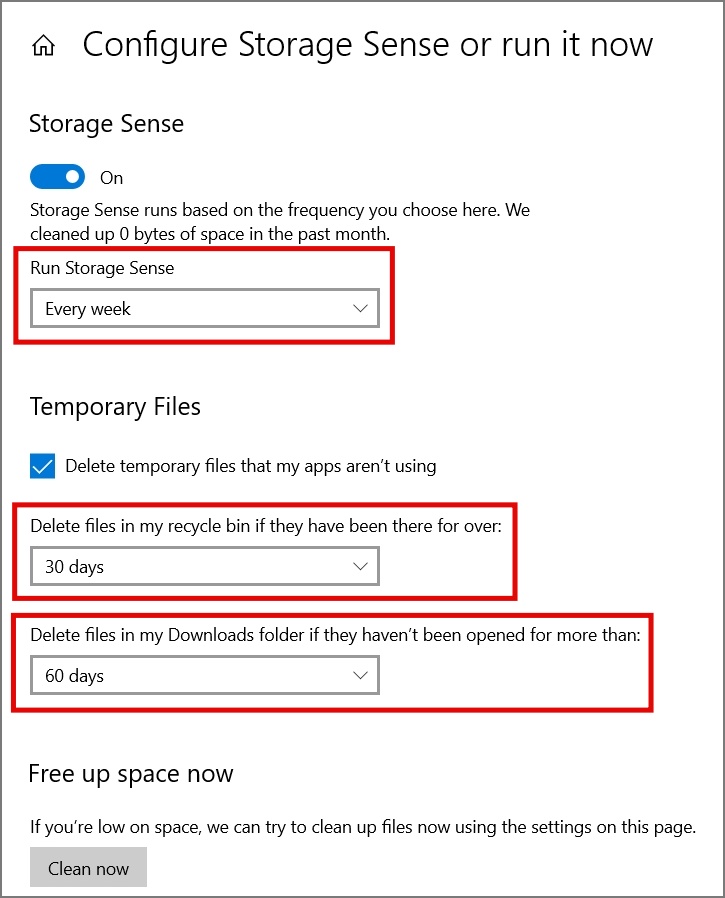
3.Now to configure Storage Sense , press it and pick thecleanup durationfor Storage Sense , Recycle Bin , and Downloads Folder .
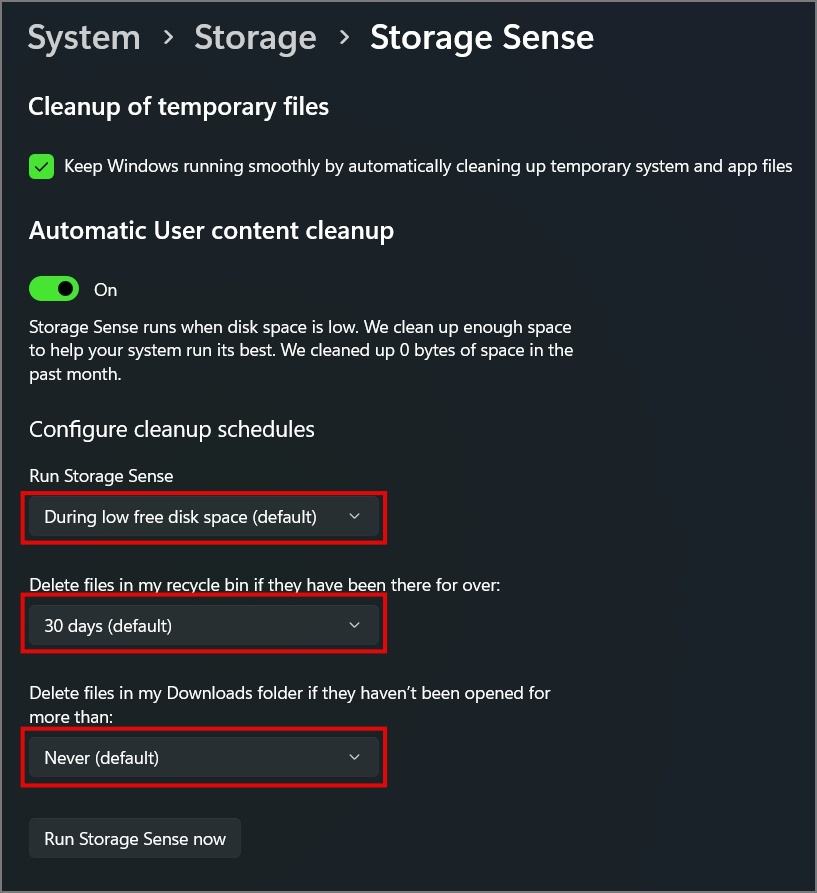
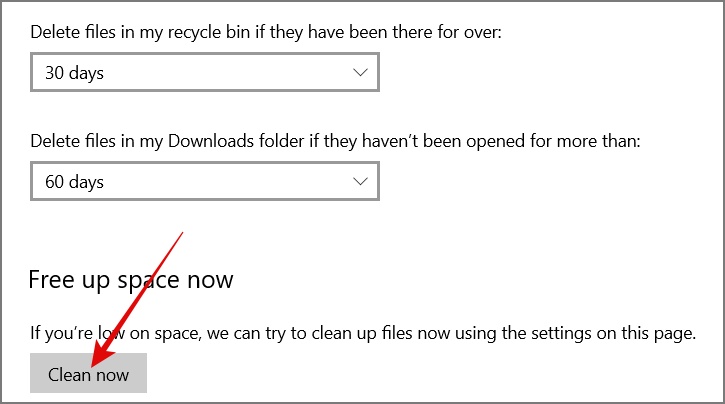
On our laptop , we have limit the take after options :
That ’s all ! It will now automatically auto - delete all the older files on your information processing system establish on the timeline you have set .
If you care tomanually launch the Storage Sense , you may simply select theRun Storage Sense nowbutton and it will begin clearing out all the irregular or quondam Indian file from your Windows computer .
For Windows 10 :
1.Launch theSettingsapp ( Windows Key + I ) and navigate to theSystempage .
2.Next , head to theStoragesection and then enable theStorage Sensefeature .

3.To make adjustments , click theConfigure Storage mother wit or run it nowlink .
4.Afterward , you may configure mise en scene as per your preference .
Also , like to Windows 11 , if you wish to manually run Storage Sense , you just take to hit theClean nowbutton .
2. Using Microsoft PC Manager
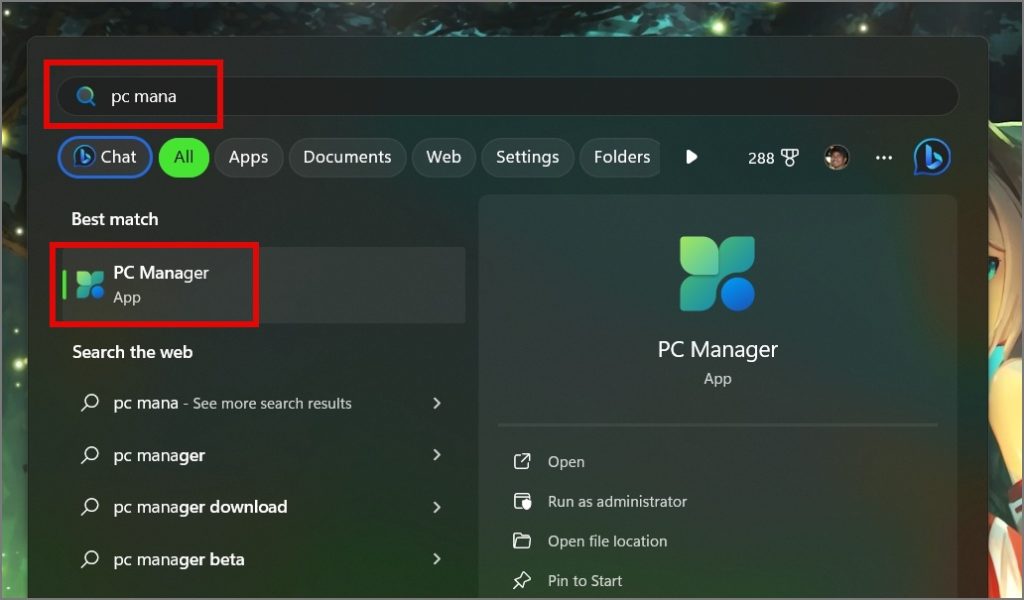
In 2022 , Microsoft introduce a newfangled peter for Windows 10 and 11 calledMicrosoft PC Manager . This simple tool enables you to clean temporary file and cope storage usage . The app also offer an option to mechanically blue-pencil impermanent files , aid you keep your computing machine free from unneeded welter . Here ’s how it exercise :
1.Download theMicrosoft microcomputer Managerapp if you have n’t already and thenopen the app .
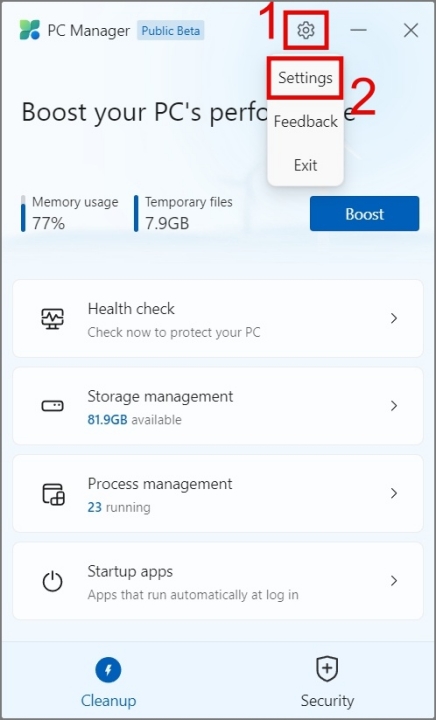
2.Next , tap theGear / Cogicon and prize theSettingsoption .
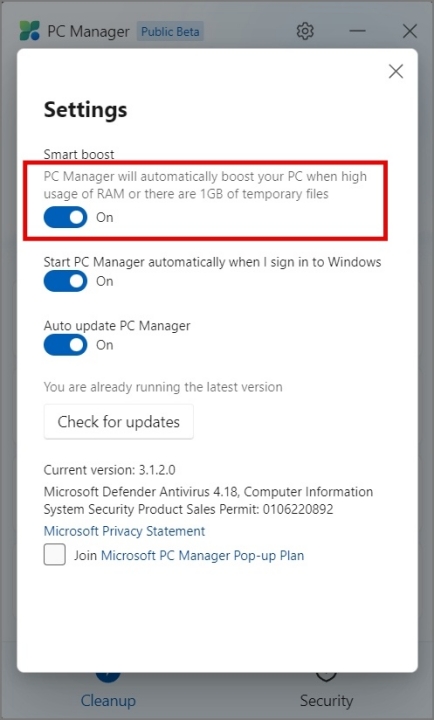
3.Lastly , start the on/off switch next to“PC Manager will automatically boost your PC ” .
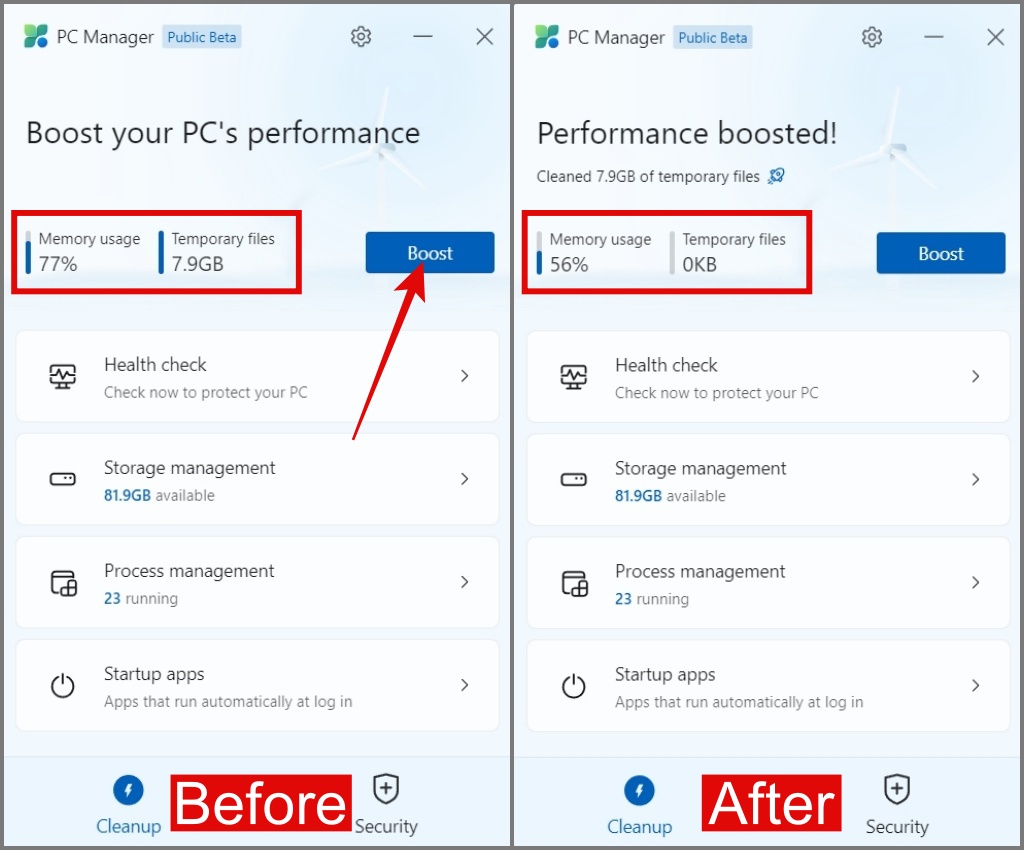
In pillow slip due to some germ , the PC Manager was ineffectual to motorcar - delete the files , you may manually light up out the data . To do so , just get through on theBoostbutton and it will instantly blue-pencil all the irregular files from your figurer along with computer memory usance .
3. Using Command Prompt
When using the command prompting , you not only have the capability to delete older file but also the flexibility to choose when to erase them base on the figure of days . get ’s get :
Note : If you want to countermand the action of the “ ForFiles program line ” and stop it from automatically delete files , you ca n’t directly vacate the legal action using the same command . So essentially you have no other option than move the folder ’s cognitive content to a dissimilar location .
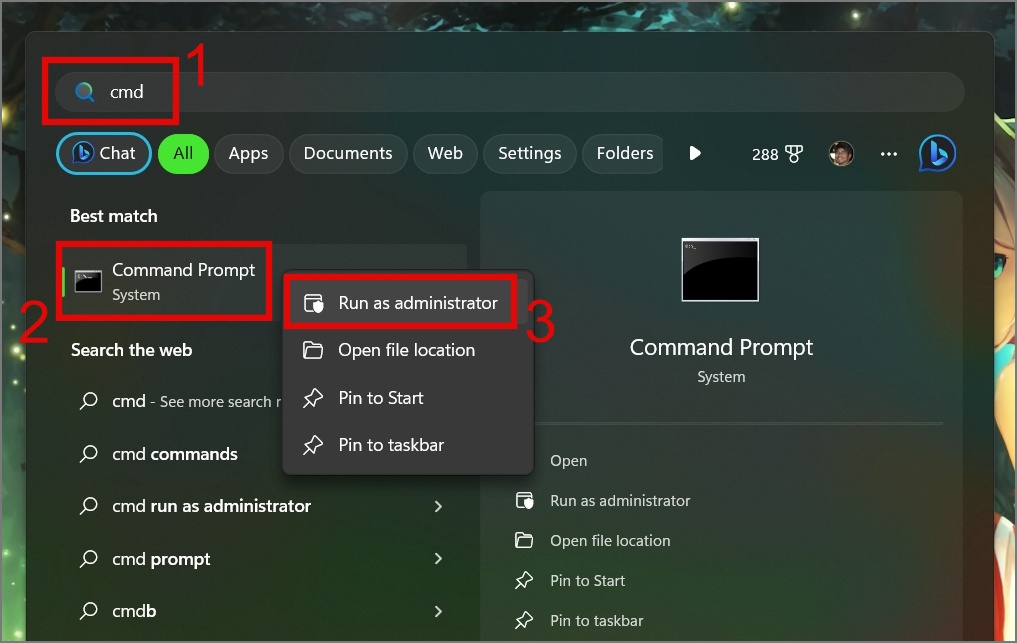
1.Launch theWindows Search(Windows Key + S ) and look forCommand Prompt . Once found , decent - tap it and selectRun as administratoroption .
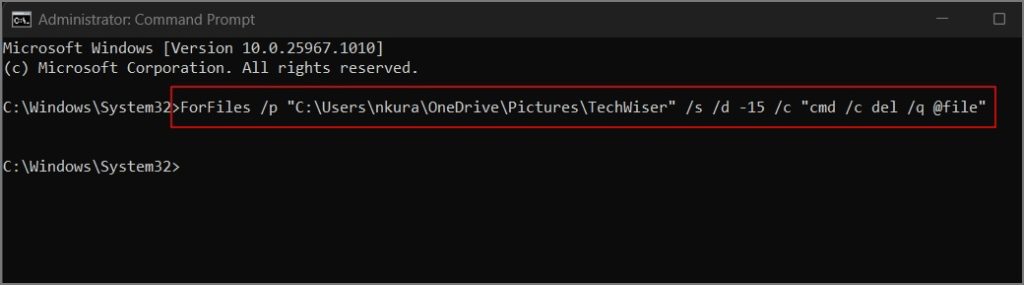
2.Next , record the followingcommandto cancel the specific files that you have n’t modify in 30 days :
Here ’s what the ForFiles command does :
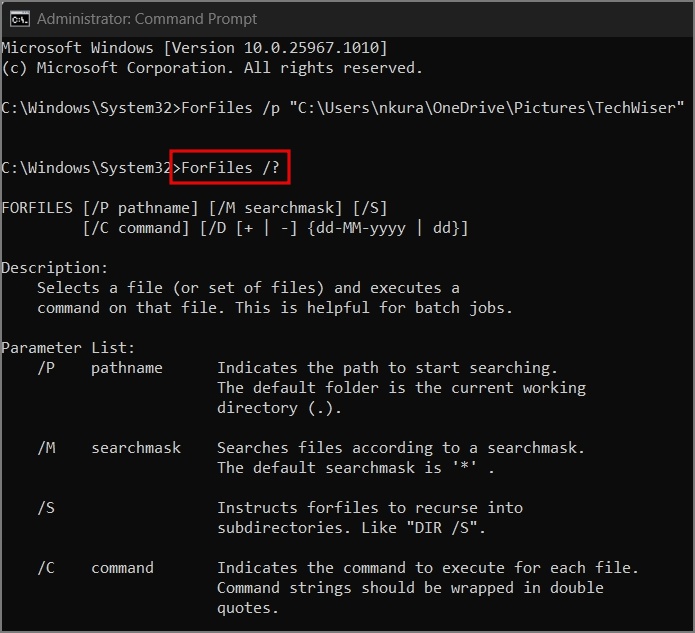
If you want to learn more about each command in detail , you may apply the ‘ ForFiles / ? ’ bidding ( without quotes ) .
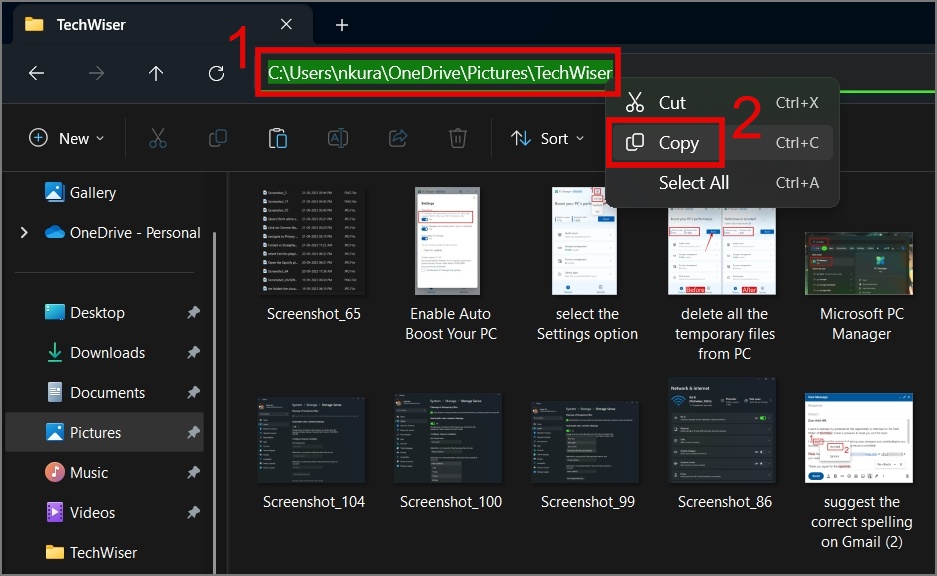
For example , we substituted ‘ C:\Path\To\Folder ’ with our specific folder location . to boot , we adjust the modify date from 30 to 15 to suit our needs .
As you may see from the image below , it instantly deleted the old Indian file that were not qualify for 15 Clarence Day .
Declutter Your Windows PC
Our Windows computers used to always be fill with mountain of old screenshots and download files , of which half become irrelevant as soon as our task is done with them . But thanks to the method outlined above , we no longer have to manually delete one-time files . The only thing we have to keep in mind is not to contribute any significant file to the folder set for car - deletion , or at least move these files to another location . We trust the above guide was useful for you as well .
Before you leave , you could also learn the keydifference between Command Prompt , PowerShell , and Windows Terminal .
Microsoft OneNote Icons and Symbols Meaning – App/Desktop
50 Years of Microsoft: 11 Times Microsoft Fumbled and Missed…
How to Transfer Windows 11 to a New Drive/SSD (Step-by-Step)
Microsoft Office is Now Free on Desktop – But With…
How to Install Windows 11 on PC With Unsupported Hardware
Windows 10’s End is Near: What Are Your Options?
Windows 11 Camera Not Working? Here’s How to Fix It
Windows 11 “Resume” Feature: Seamlessly Switch Devices
Windows 11 Installation Has Failed? Easy Fixes to Try
Windows 11’s Multi-App Camera Support: How to Enable and Use…