Where are screenshots saved on Mac ? This is an important question because it can save a lot of prison term when you have several screenshots to work with . I will show you two way to vary where are screenshots saved in macOS so that you’re able to finish your quickly and without suspension . you’re able to use either method acting to insure where screenshots are save on your MacBook .
1. Screen Capture and Recording Settings (Beginner-Friendly)
We will employ a simple keyboard shortcut to quickly change where screenshots are save on macOS from the screen gaining control and register toolbar .
1.Go to your background and minimize all apps to derogate beguilement .
2.PressCmd + switch + 5on your keyboard . It will open thescreenshot and concealment recordingtoolbar near the bottom side of the covert . Click onŎptionshere .

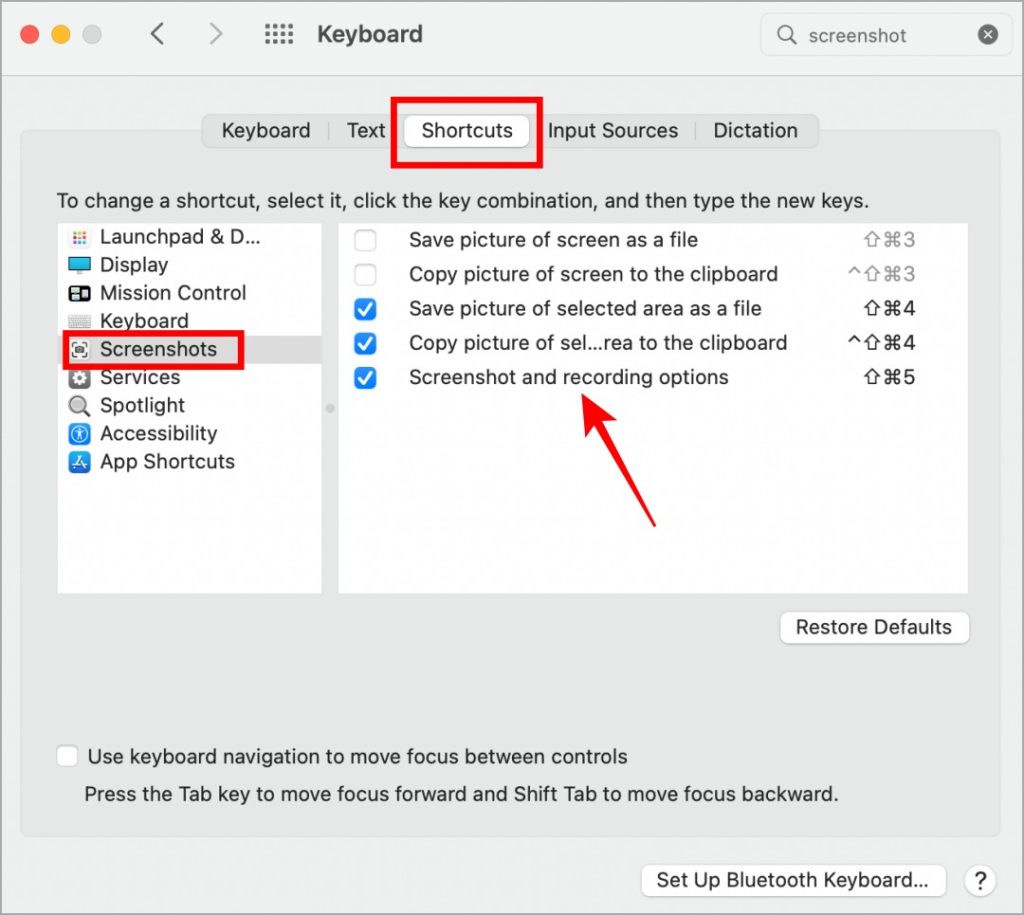
take down : If the keyboard shortcut is not bring for you , go toSettings > Keyboard > Screenshots > Shortcutsand checkScreenshot and recording optionsthere .
3.Click onOther Locationfrom the flyover computer menu .
Bonus Tip : you may also directly send a screenshot to Message and Mail apps by tapping on the corresponding options from the leaning . Plus , if you just wish to replicate the screenshot to the clipboard , you could do so by click onClipboardbutton . you may also conceal and show the mouse pointer in screenshots by clicking onShow Mouse Pointeroption .
5.A new pop - up window will open up . Navigate to the desired location by clicking on the left side of the window . For illustration , we ’re going with the Pictures folder . Now click onNew Folderto make a leaflet just to preserve screenshots .
6.Give a name to the new folder and click onCreate . For example , we ’ll be name it Screenshots so we can place it easily later .
7.Now click onChooseto reassert the folder for novel screenshots . And that ’s it , now whenever you take a fresh screenshot , it ’ll be saved directly in this leaflet ( or the location you choose on your Mac ) .

Must interpret : How to Take and Highlight a Screenshot on Mac .
2. From Terminal App (Advanced Users)
Working with the Terminal app can be disorienting for some user . It want type bid . If you do n’t opt this , then go for the above method .
1.PressCMD + Spaceto undecided Spotlight , search forTerminaland open it .
2.Once the Terminal is undetermined , written matter - paste the bid below .

3.Nowtype the directoryof the locating where you want to save the screenshots , followed by the control you just paste / typecast . And please check that that there ’s a space after the word “ localization ” of the above command . For example , we ’re going to type the directory of the “ Screenshots ” brochure that we just created in the 1st method .
4.Once you ’re done typing the directory , pressEnter / Returnkey on your keyboard to escape the command .
5.After this , restartyour MacBook . If you do n’t want to restart MacBook , type the below command in the Terminal but observe that it may close all unresolved apps so do save work .

6.Now pressEnter / Returnkey . Now all your future screenshots will be saved in the new assign folder .
Screen Test
So there are two way to alter the default location of where screenshots are saved on your MacBook . One from the setting and the other from the Terminal . In a nutshell , if you ’re not conversant with the Terminal then go with the first method acting . If you ’re a front - goal developer , then Terminal one would be well-situated for you .
Do you have it away how totake and foreground a screenshot on your MacBook ? macOS has many interesting annotation tools . There aremany different screenshot apps for MacBookif you do n’t like the default method which can be define for pro users .
Apple iCloud Icons and Symbols Meaning – Complete Guide
Best Macbook in Every Price Range and Use Case: Mac…
Apple Could Launch Its Updated Macbook Air With M4 Later…
Turn Any Website Into Your Mac’s Wallpaper With This App
Apple M5 Chip: Why It’s Sticking to 3nm Technology
macOS 15.2 Beta: Add Weather Widget to Menu Bar on…
How to Check MacBook Battery’s Health and Cycle Count (M…
macOS Sequoia 15.1: How to Enable and Use Type to…
6 New Features Coming to macOS Sequoia 15.1
7 Settings to Make macOS Feel-Like Windows


